Overview and Objective
In this unit, students will explore different types of fractals. This unit contains seven different activities. The first three activities emphasize the self-similarity property of fractals, whereas the rest will make students explore the fractals' fractional (non-integer) dimensions.
Activity #1 - Fractal Tiles
In mathematics, shapes that have self-similarity are called fractals. They have an infinite pattern that appears similar no matter how closely you look at them. Students can explore the Fractal Course on Mathigon as an introduction to fractals.
Having the same pattern in every scale of the main shape is just a small part of the fascinating properties of fractals. We can start exploring these properties using a series of different activities.
There are ready-to-use fractal tiles on Polypad. These are concave hexagons in five different sizes.

Let students open a blank canvas and insert all five sizes of fractal tiles. You may ask them to measure the side lengths and angles of the tiles to discuss their relations. Students can also explore the relations among the different size tiles by connecting them edge to edge. You may talk about dilation as a transformation tool to create different sizes.
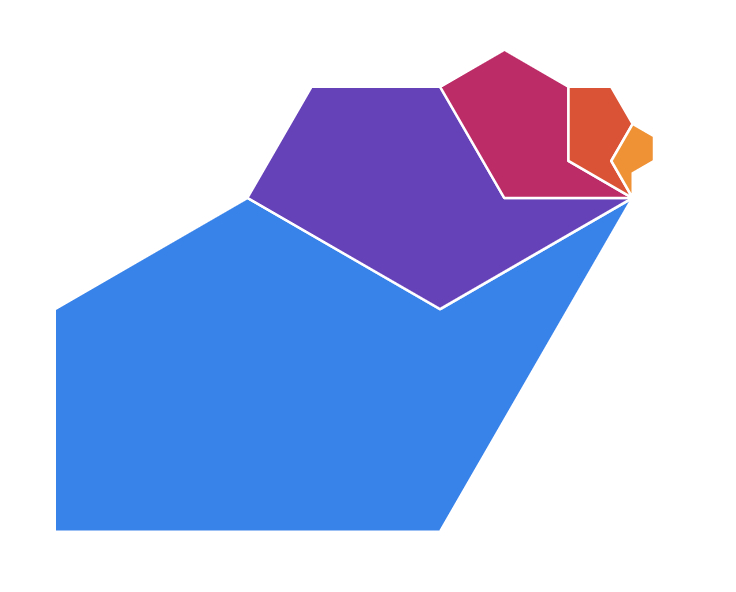

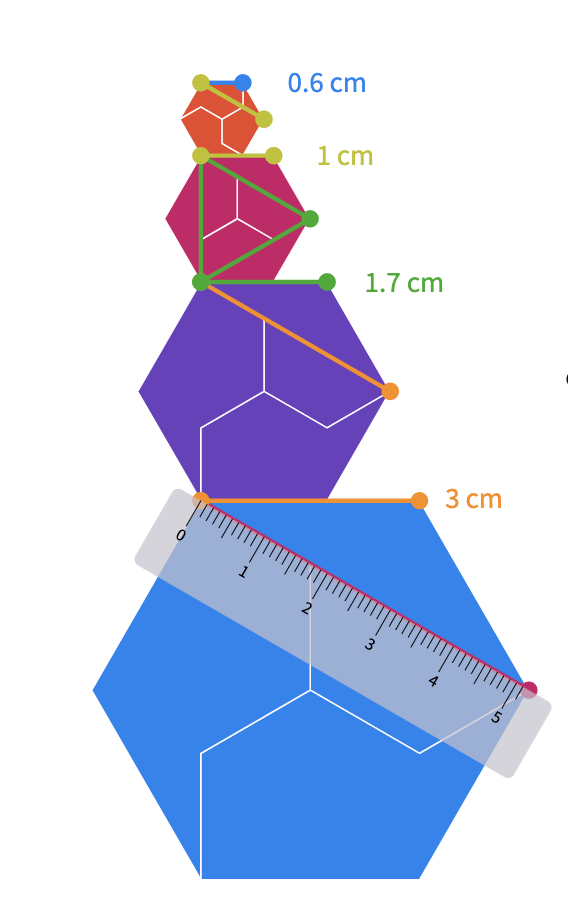
You may also ask students the ratio of similarity between the consecutive sizes.
There are only two different side length measurements for each tile. Students may realize that when they group any three congruent tiles, they form a regular hexagon. The shorter side of the next tile will have the same side length of the hexagon, and the longer side will have the same length of the side length of the triangle in it.
Share this canvas with students to let them complete the missing parts of the given fractals.
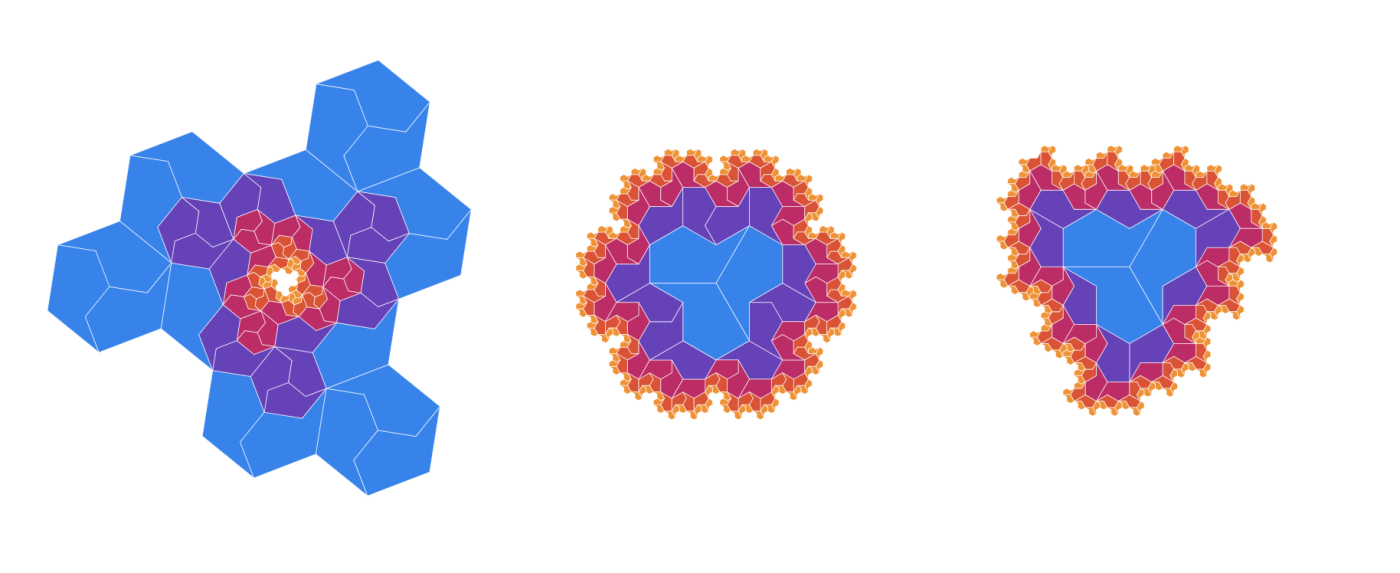
Invite students to share their work with the class.
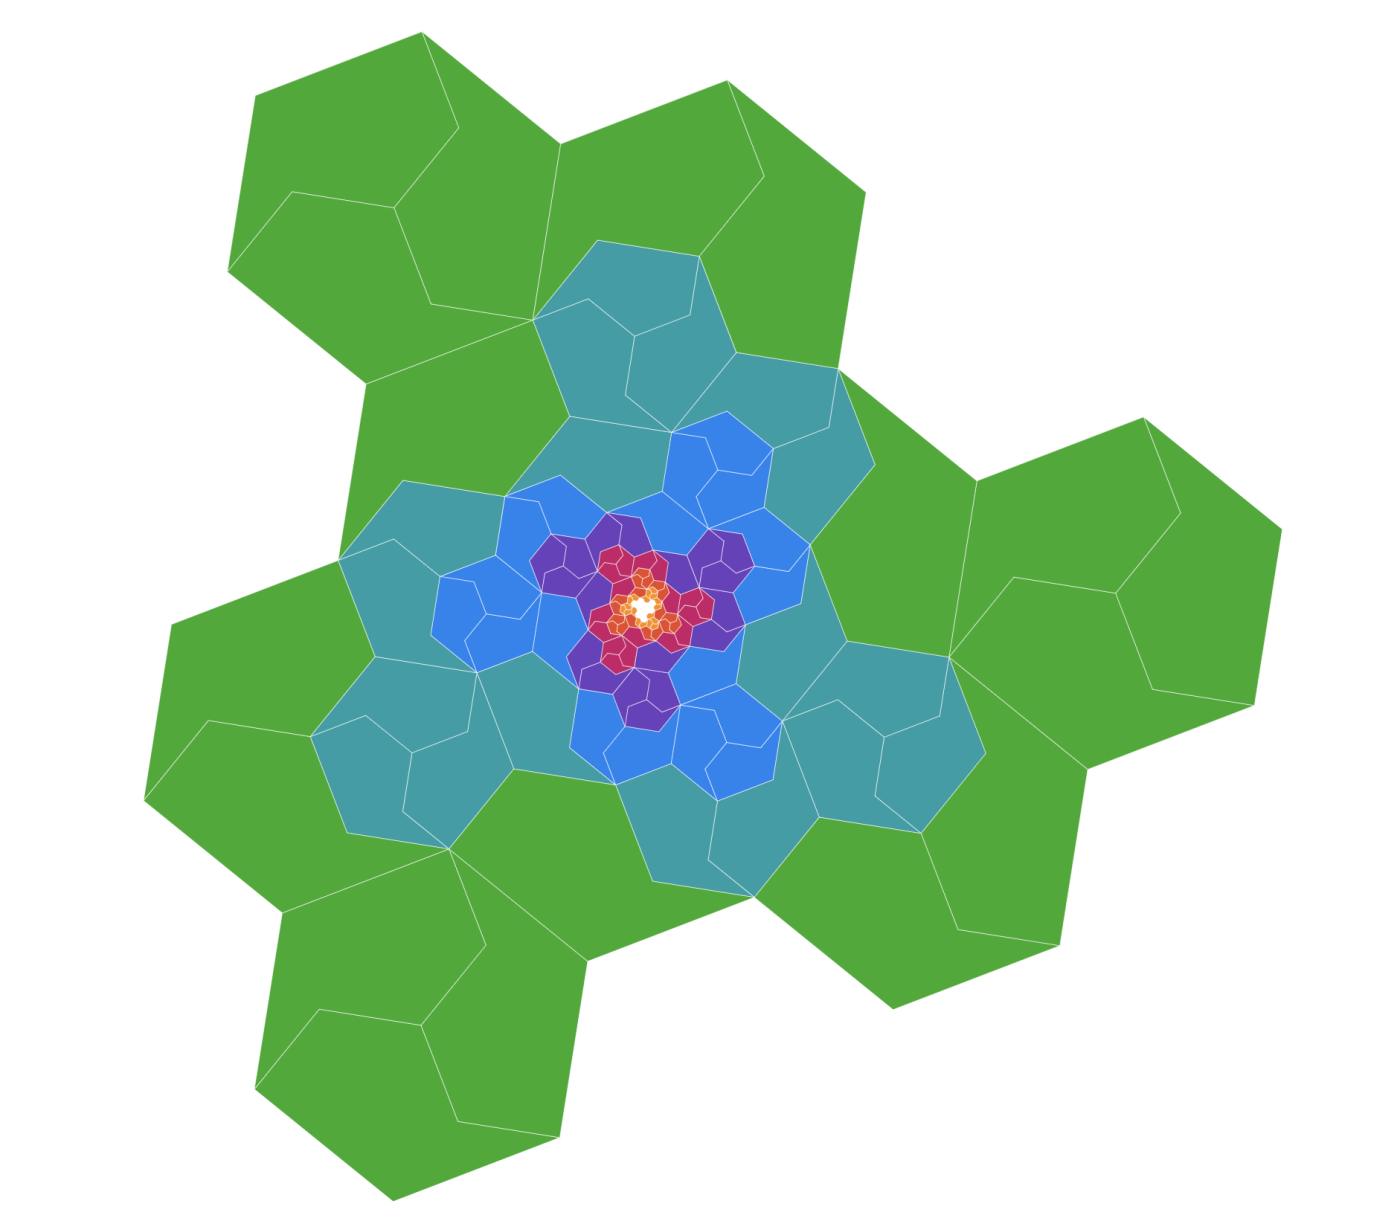
Ask students how they can create the next fractal tile (size 6). There are several ways of making the following sizes. You can discuss some possible strategies to create the next shape. For example, you may ask students to analyze the shapes. They can start with creating the existing shapes to realize they can be formed using regular hexagons, equilateral triangles, and even the Penrose tiles; kite and dart.
Another easy and surprising method would be using the existing fractal designs.
Close the lesson by letting students make their designs bigger using the newly-created tiles. For example, here is a canvas including a fractal with sizes 6 and 7 fractal tiles.
Activity #2 - Spidrons
A spidron is a continuous geometric figure composed entirely of the scaled copies of the same polygon it is made of. They are remarkable examples of fractal geometry.
Here is an example of an alternating sequence of equilateral and isosceles (30°, 30°, 120°) triangles. This blue one is a semi-spidron. When you connect two of them by the longer sides, they are called spidrons. You may want to explore spidron tilings using this canvas.
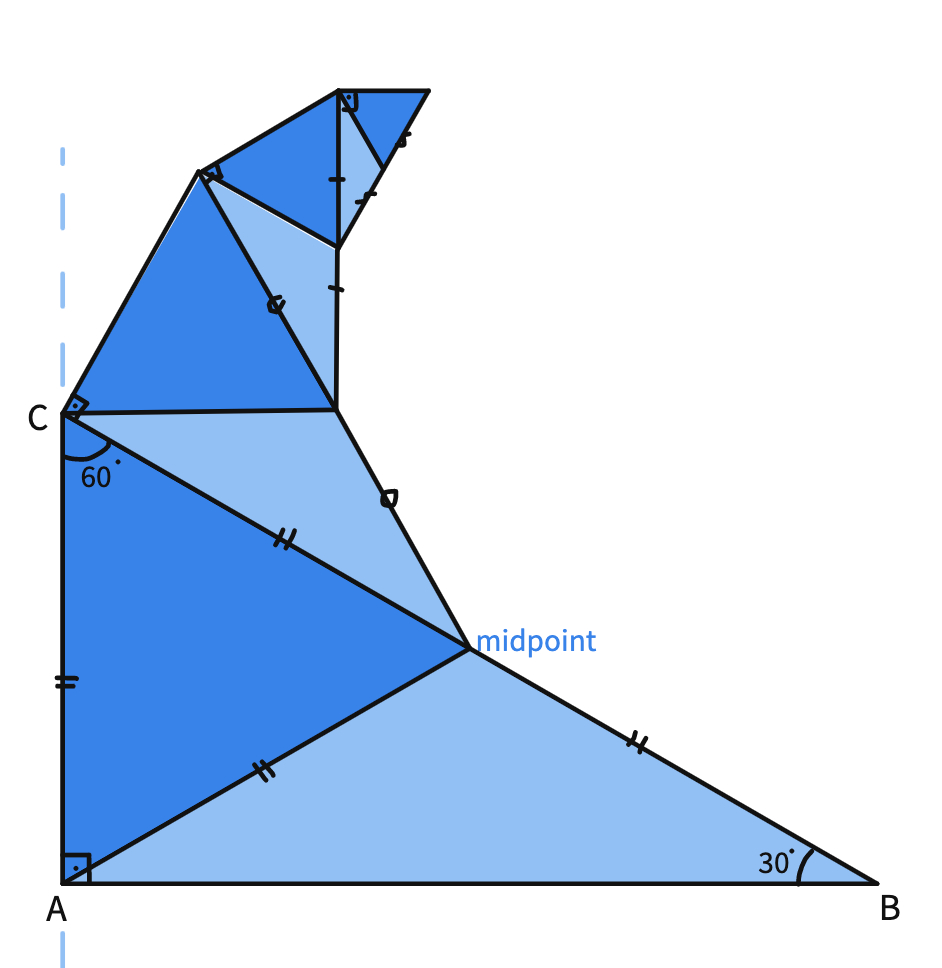
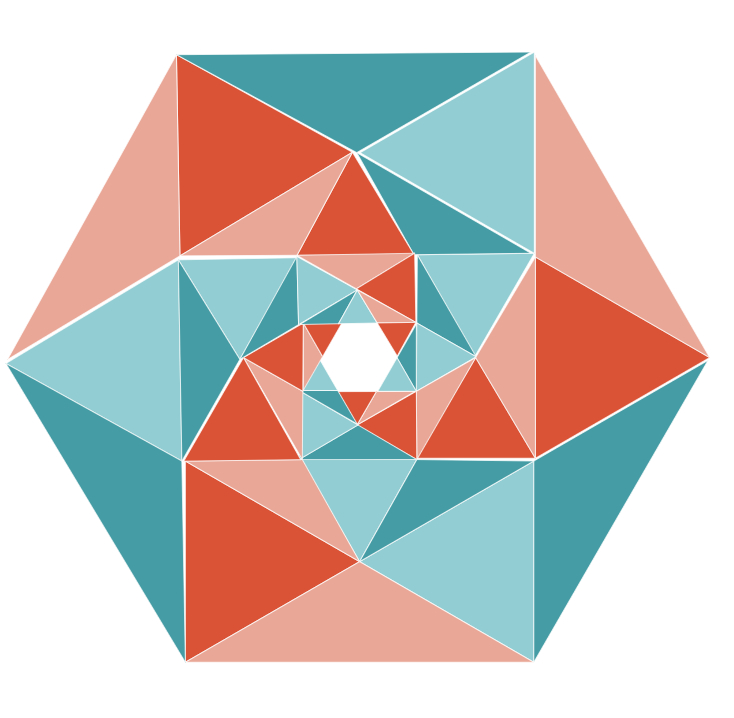
Here is a lesson plan for spidron construction. In addition, there are more accessible spidron models students can create. For instance, using scaled copies of a isosceles right triangle can help create spidrons.
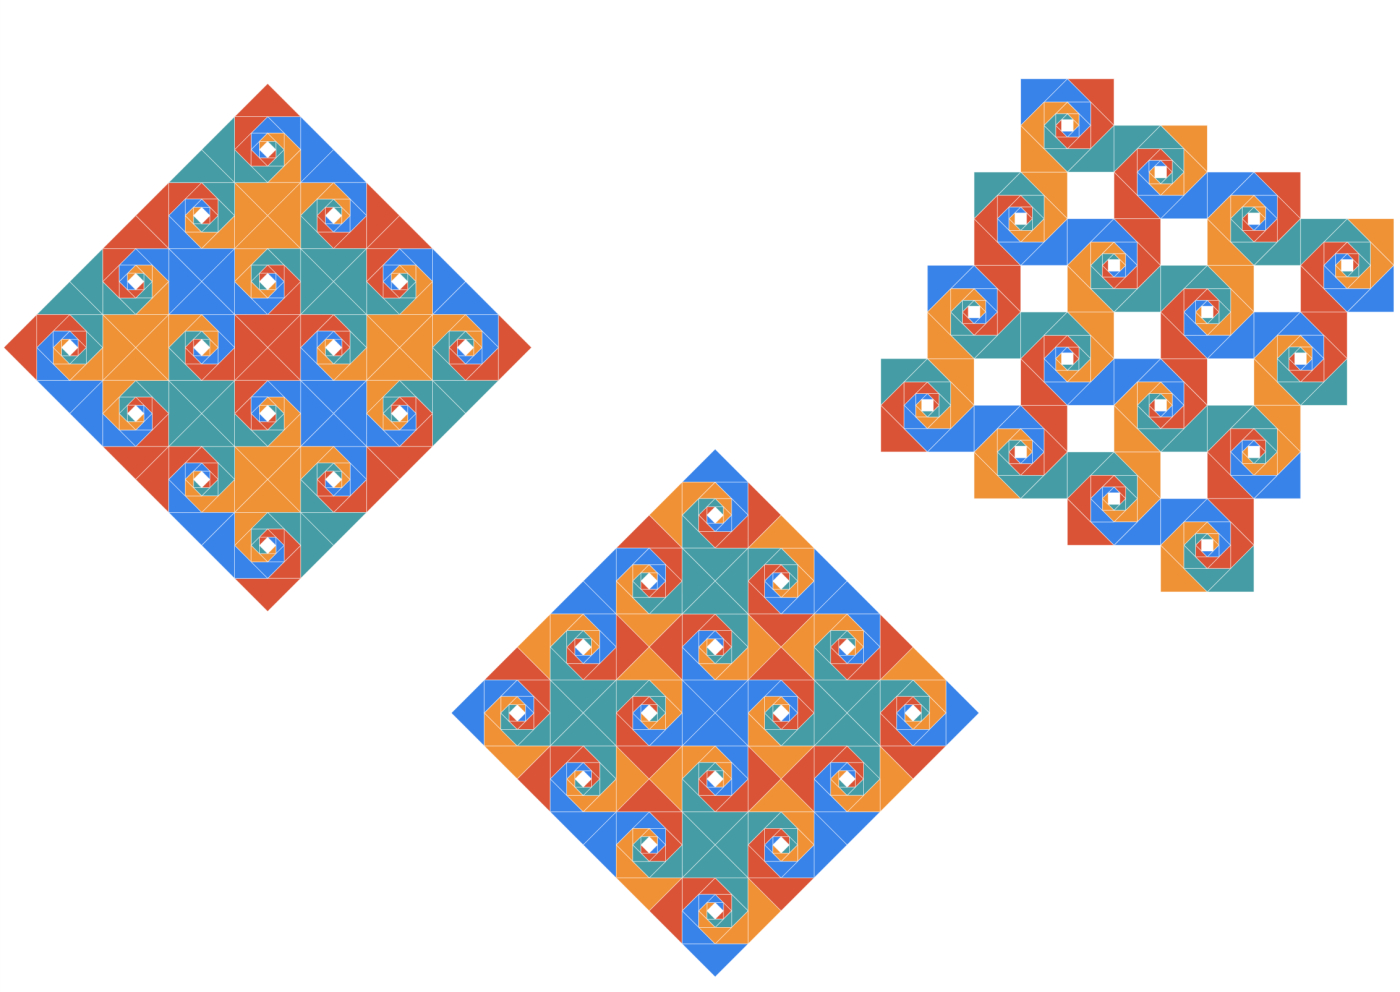
Spidrons can tile a plane in different ways. In other words, they can tessellate. You may ask students to use the spidrons they have created to make different tessellations. Here are some possible designs;
Activity#3 - Rep-tiles
Start with asking students the famous puzzle of dividing shapes into four congruent pieces using this canvas.

The answer to this famous puzzle is actually based on the concept of rep-tiles.

Continue with introducing rep-tiles to students.
Some shapes can be used to tile an enlargement of themselves. In mathematics, they are called rep-tile, meaning Replicating tile. When several copies of these tiles are put together, the shape will appear precisely the same but magnified! Like the fractals!
Every square, rectangle, parallelogram, rhombus, or triangle are examples of rep-tiles.
Show students the square and triangle examples and let them work on the parallelogram, rhombus, and trapeziums.

You may also mention the labeling of rep-tiles
A rep-tile is labeled rep-n if the dissection uses n copies. Thus, every square, rectangle, parallelogram, rhombus, trapezium, or triangle is rep-4.
Here is a lesson plan that uses Polypad’s tetrominoes as rep-tiles for exploring enlargements (dilations) and scale factors.
Remind them to think of fractals as shapes that are self-similar at smaller and smaller scales. You may suggest removing one of the pieces of the L shape and replacing it with the smaller L shape. This tiling is also called Chair or Trominoe Tiling.
Share this canvas with students to let them create a rep-tile fractal.
Here are some possible drawings;
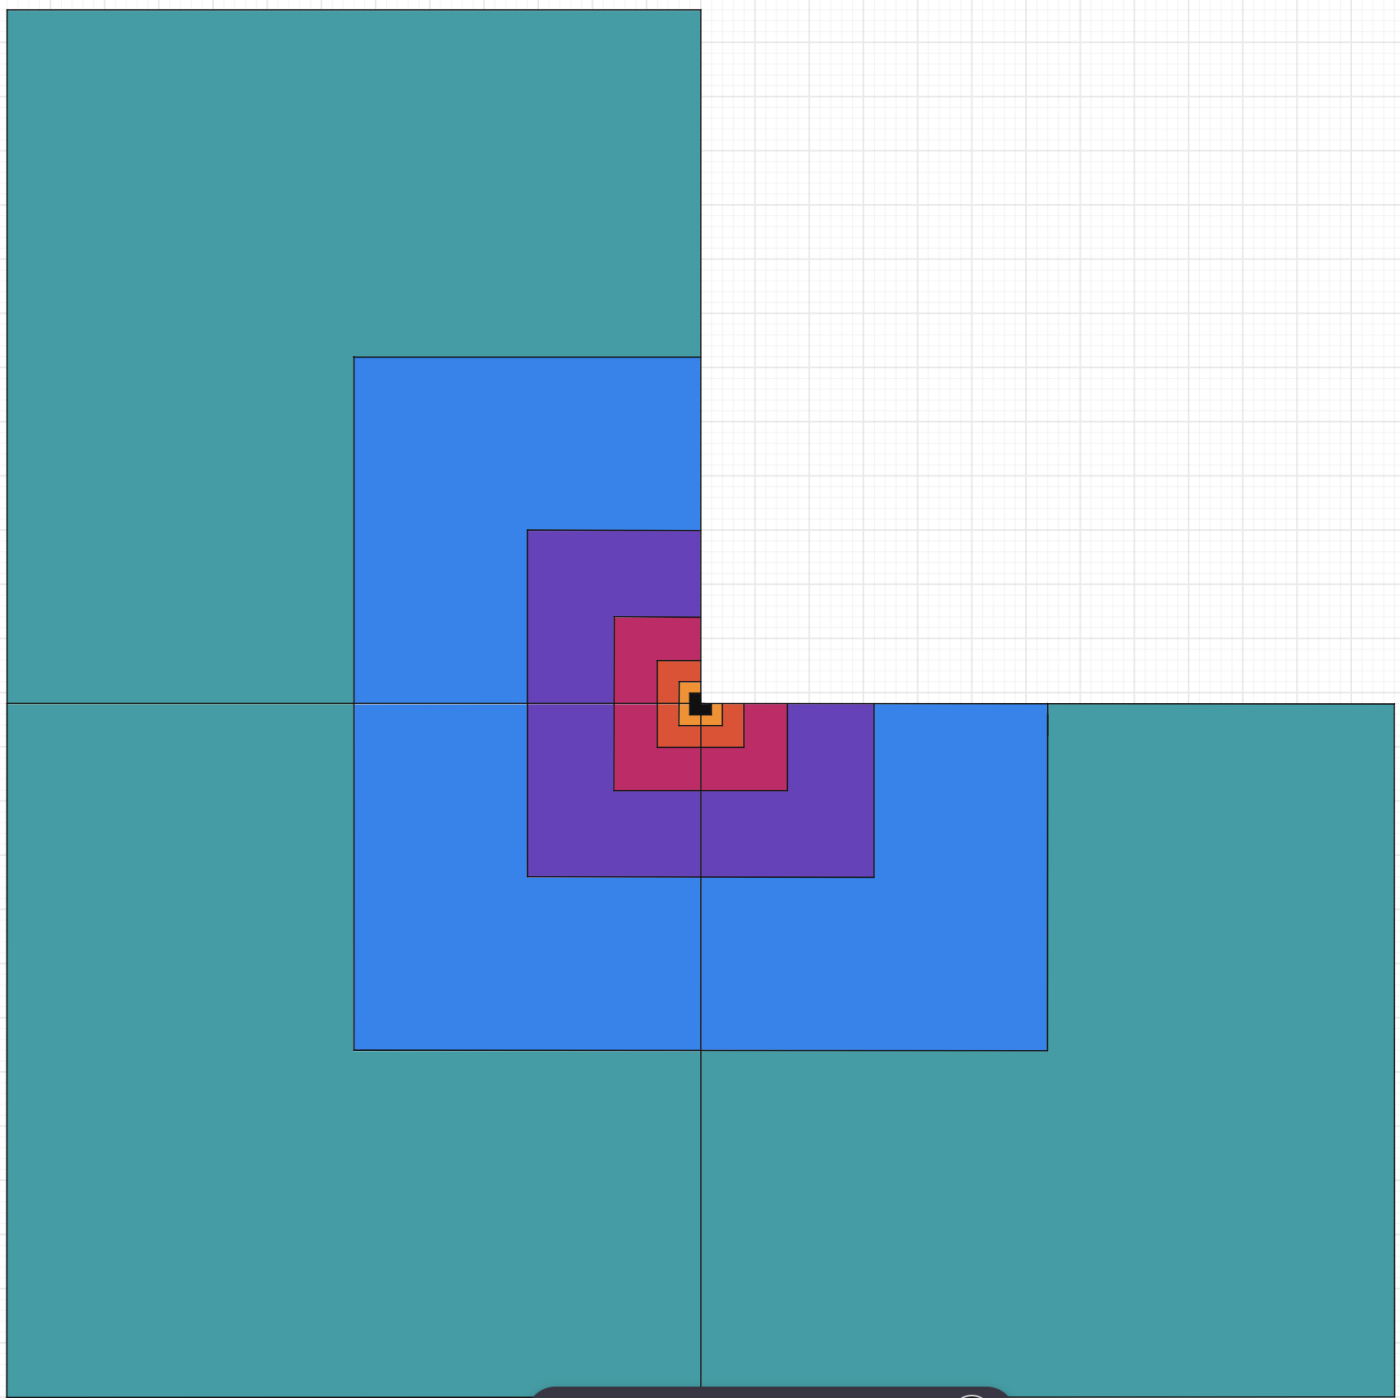
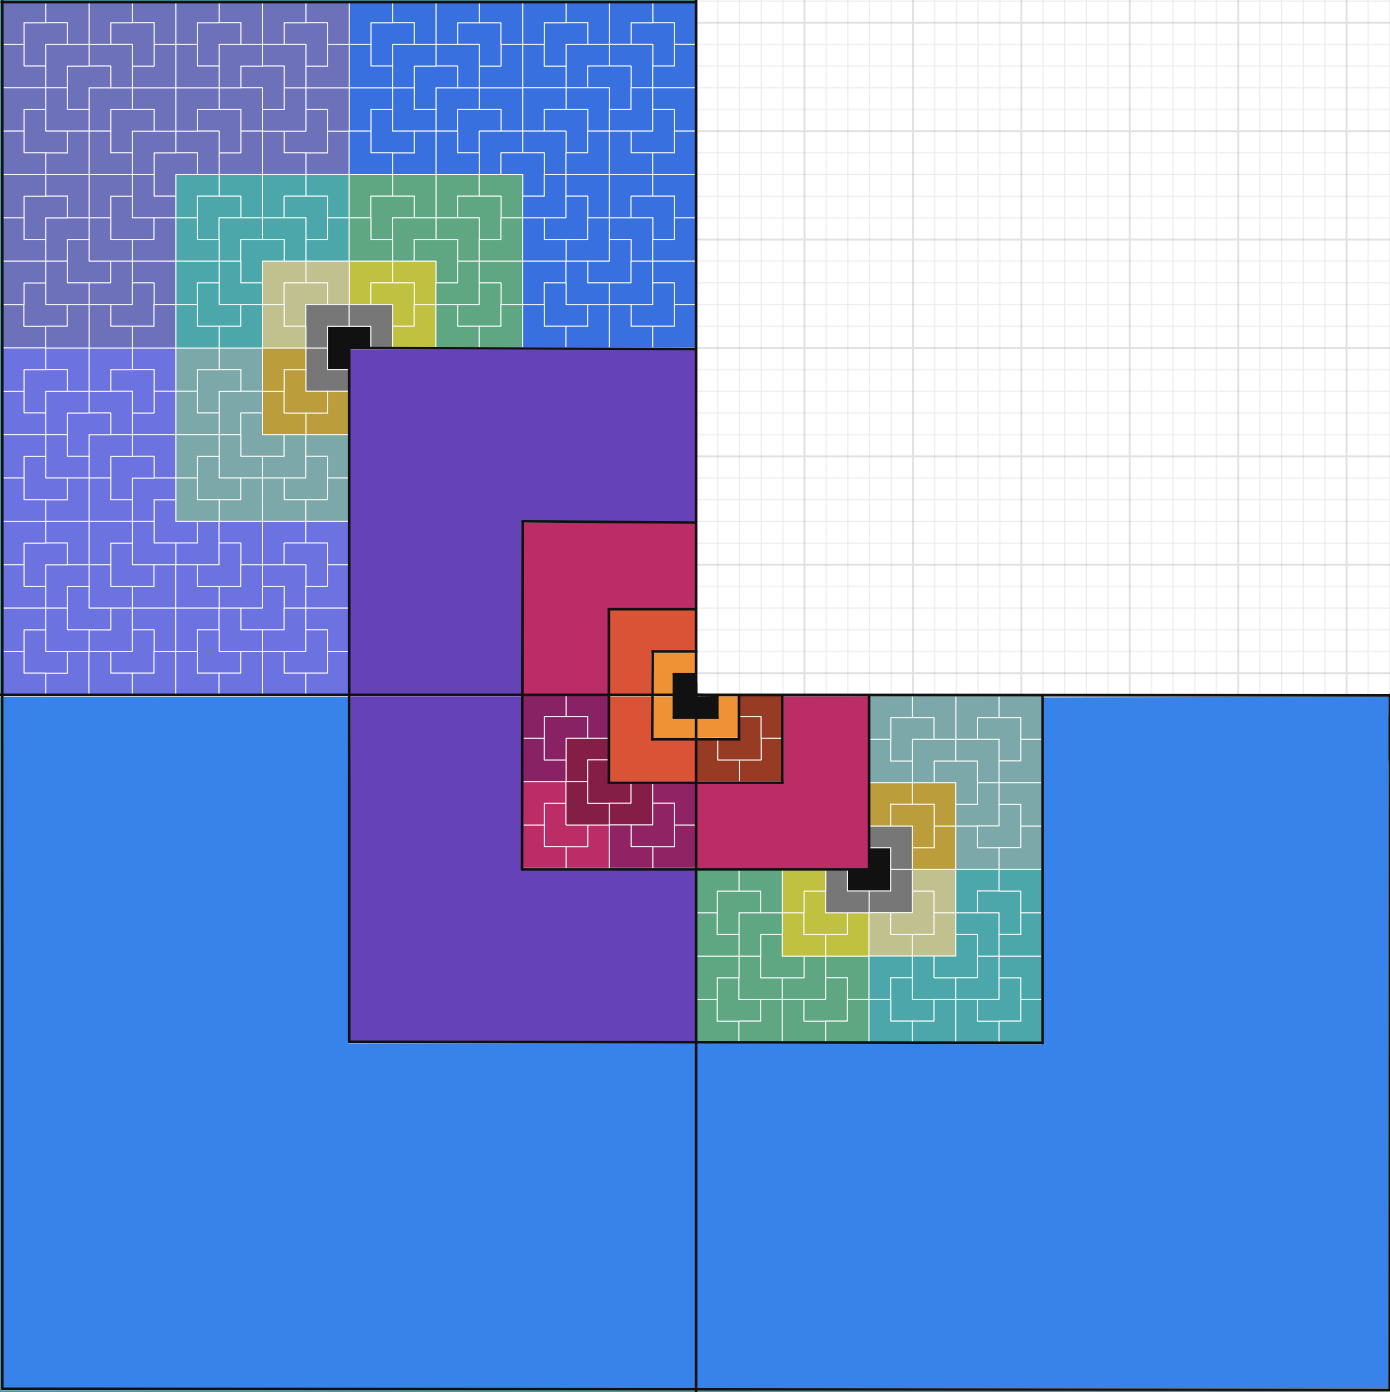
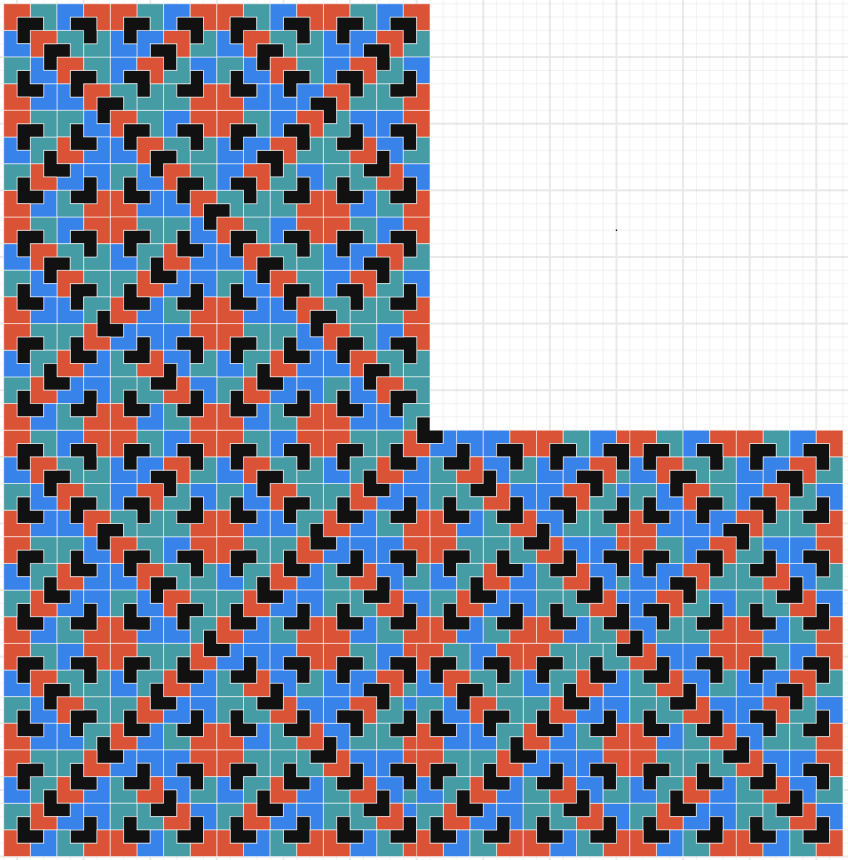
You may want to try other reptiles to form different fractals. Here is another lesson plan about sphinx tiles as rep-tile fractals.
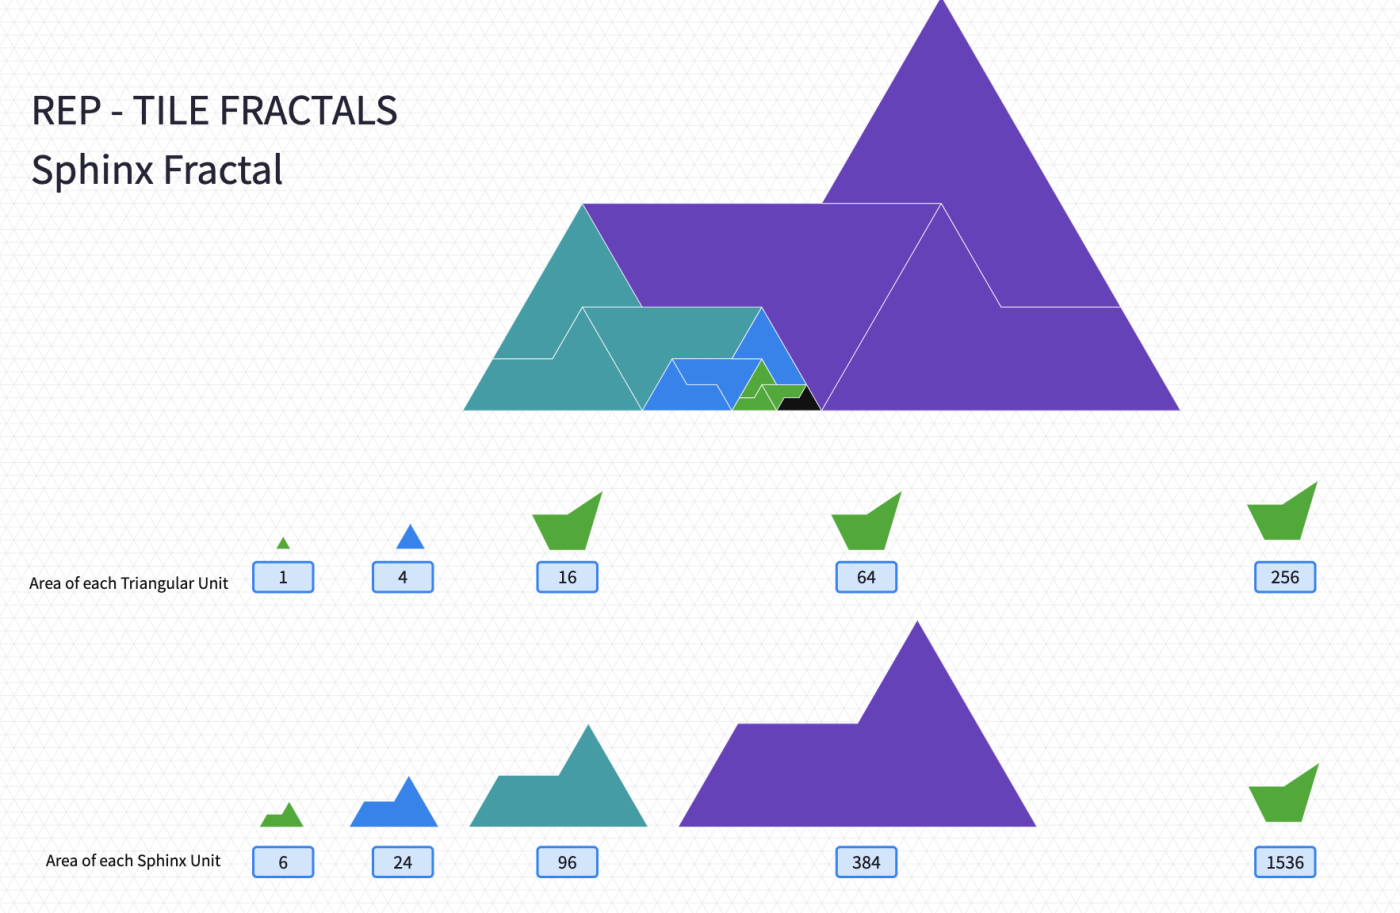
Activity #4 - Sierpinski Triangle
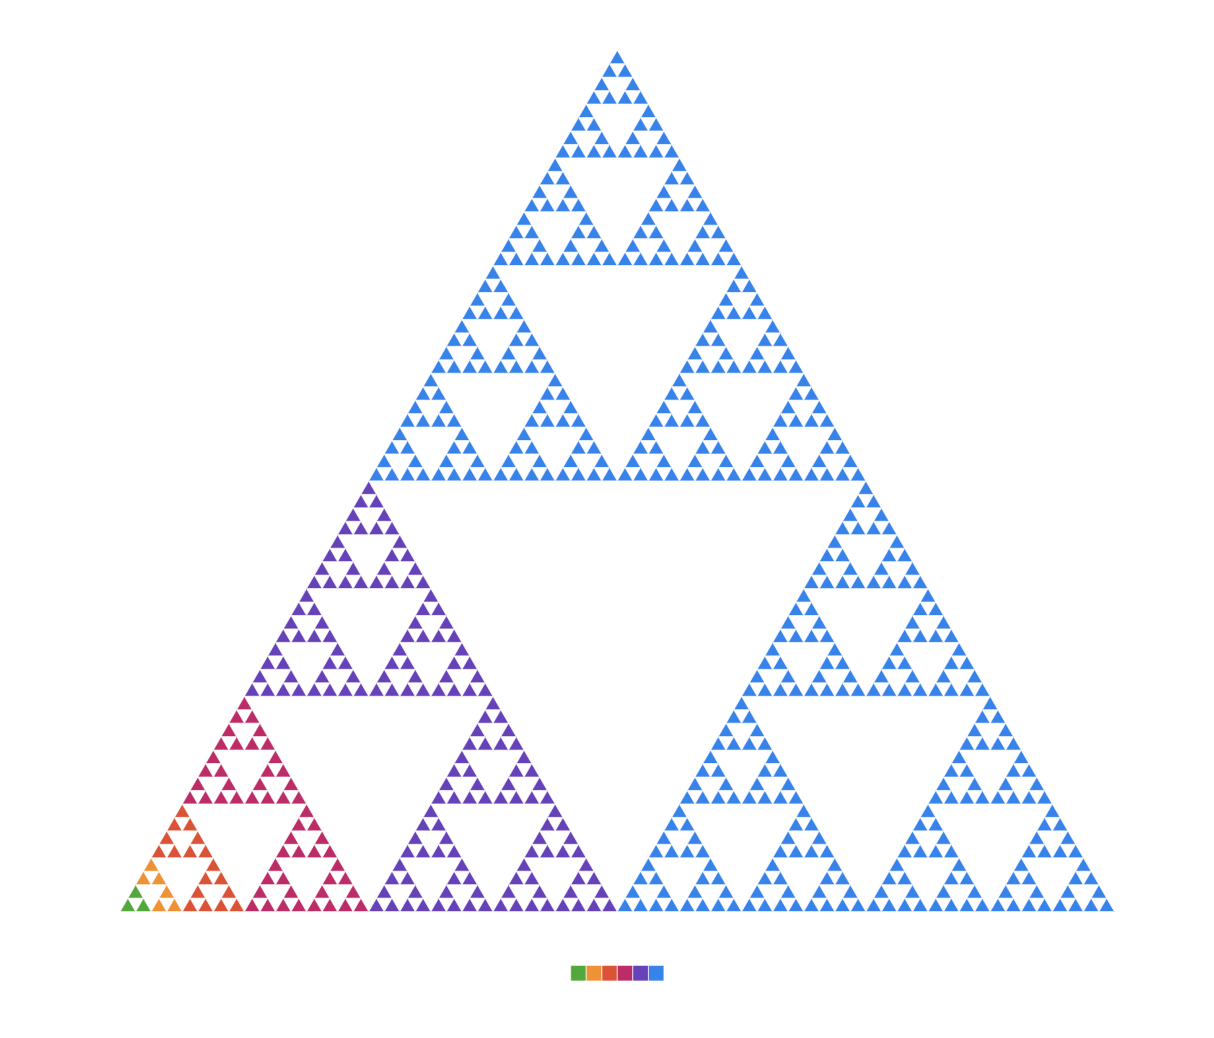
One of the most famous self-similar fractals is the Sierpinski triangle. You may show students an example using this canvas.
Ask them to identify the shapes and the possible methods to create the fractal.
They may identify the triangle as equilateral; if not, you may use the ruler and protractor to explore the type of the triangle. Clarify with the students that to create the Sierpinski triangle, one starts with a large, equilateral triangle and then repeatedly cuts smaller equilateral triangles out of the remaining parts.
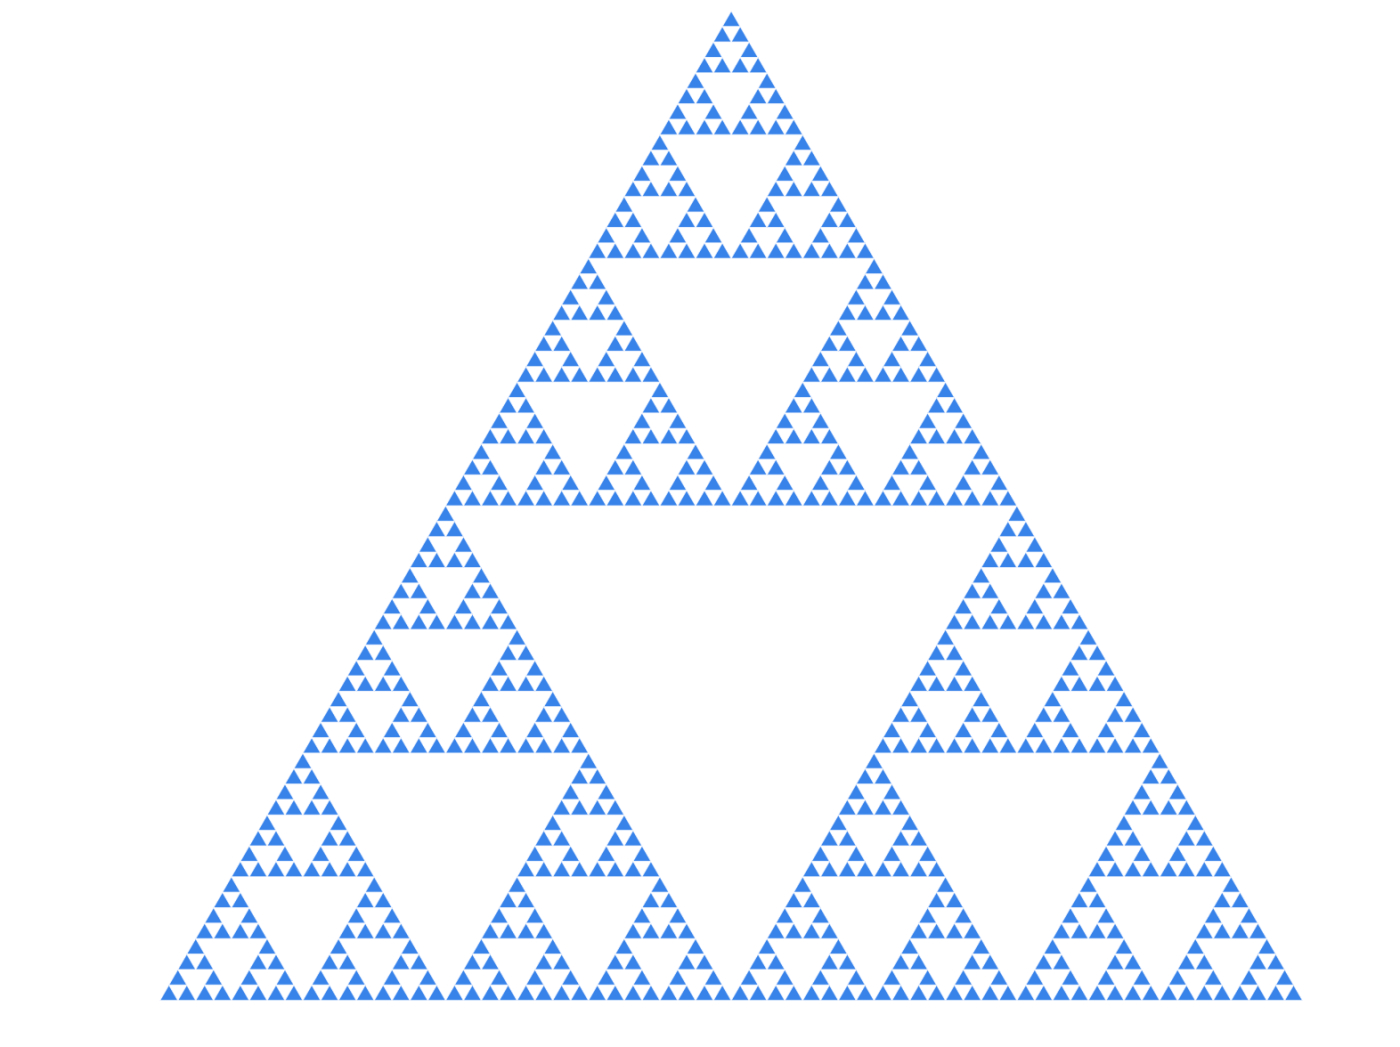
Discuss with students how to re-create this fractal. The easiest method might be using the unit triangle and creating a larger triangle by combining three of them in each step. First, let students open a blank canvas and enable the isometric grid. Then, they can use the random-polygon tool to create a unit triangle.
Let students complete their drawings by making at least five enlargements.
There are many interesting things about the Sierpinski triangle.
You may group them in pairs to ask about the perimeter and the area of the Sierpinski Fractal in each step. You may give an example for the initial step on the isometric grid to define one unit in length and area.
You may also remind students that when measuring the perimeter of the fractal, they need to consider the inner edges as well.

Here is a canvas you may use to demonstrate these facts.
Once students start to work on the perimeter and the area at each step of the fractals, consider having students explore these questions.
- The ratio of the shaded area (Fractal's area) to the entire triangle's area.
- What do they notice in each step?
- Is the ratio getting bigger or smaller?
- Which value is the area getting close to?
- Can they predict the fractal's area for the following steps?
- What happens to the perimeter of the fractal?
- What is the growth pattern of the perimeter of the fractal?
- Can they predict the fractal's perimeter at the following steps?
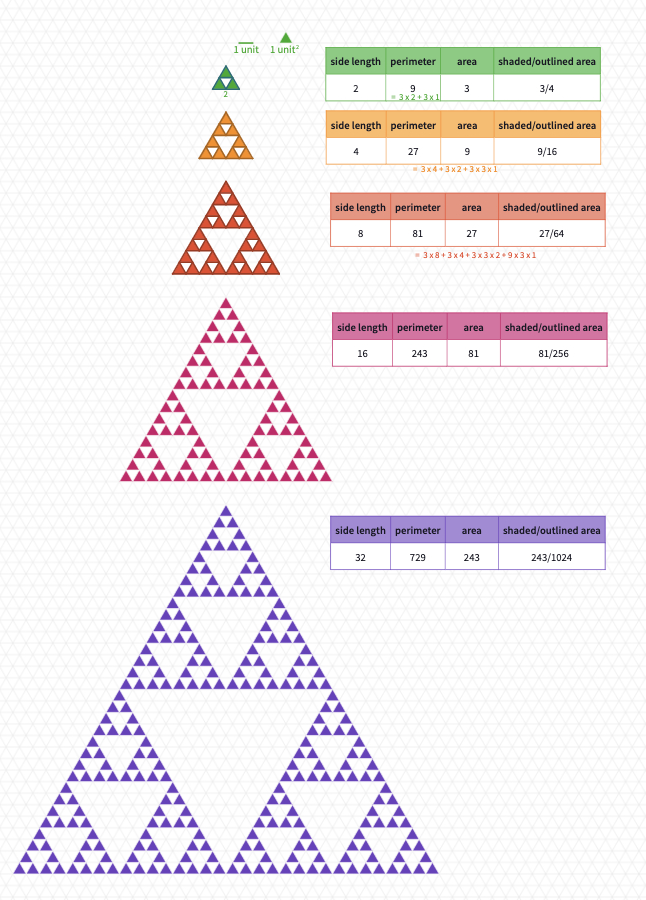
Clarify with the students that we remove some of the areas of the Sierpinski triangle with every iteration. If we could do this infinitely many times, there would actually be no area left with respect to the infinitely long perimeter.
Seeing a finite (even close to 0) area with an infinitely large perimeter might surprise students. So you may want to let them discuss this unusual property of the fractals for a while.
Ask students what happens to the area numerically when we scale the Sierpinski fractal by a factor of 2.
Make sure they all see that it’s “area” of the fractal increases by a factor of 3.
You may want to use the Fractals Course of Mathigon to remind them of the way we explore the dimensions of the shapes.
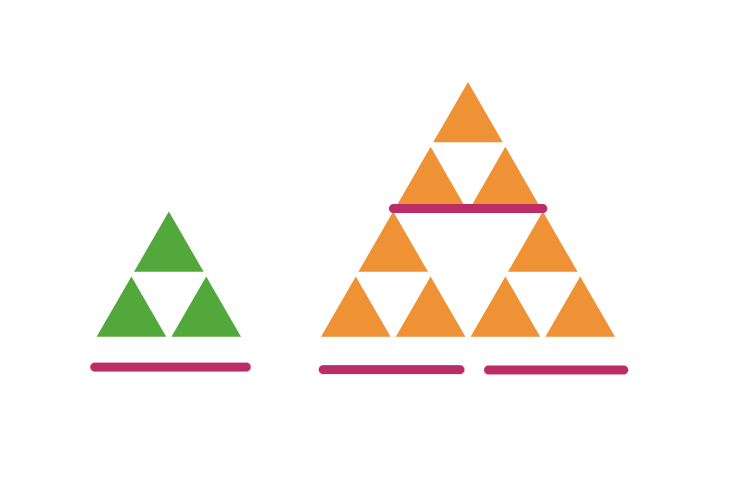
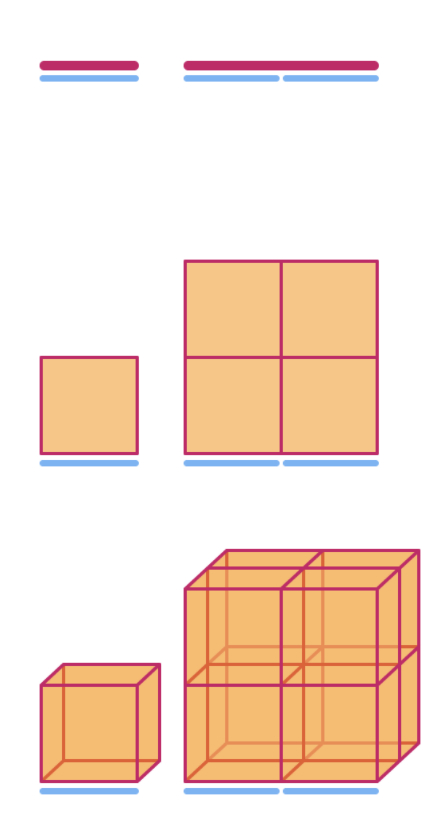
We know that a line has one dimension, "". When scaling it by a factor of 2, its length increases by a factor of 2.
A square has dimension 2. When scaling it by a factor of 2, its area increases by a factor of 4.
A cube has dimension 3. Therefore, when scaling it by a factor of 2, its volume increases by 8.
Now ask students to apply the same logic for the Sierpinski Triangle;
Here we double the fractal, but it becomes three times bigger.
If the students know about logarithmic calculations, you may show the calculation as
In other words, the dimension of the Sierpinski triangle is around 1.6.
This will be another surprising moment for students. A shape with a non-integer dimension!
Discuss with students that although it seems impossible, this is just one of the weird properties of fractals. In fact, this is what gives fractals their name: they have a fractional dimension.
Remind them that they found that if they can keep removing the triangles infinitely many times, there would actually be no area left: that’s why the Sierpinski triangle is something in-between a two-dimensional area and a one-dimensional line.
There are many more interesting facts about the Sierpinski Triangle. You may want to check Mathigon's related course to see its connection with Pascal Triangle and Chaos games.
You may close the lesson by mentioning the widespread use of Sierpinski triangles.
Sierpinski triangles are also used in MoCap (Motion Capture) suits. Students might have seen superhero suits made up of fractals too. They are often called scale-independent tracking patterns since the recursive scales allow layers of refinement to the track.
Activity #5 - Sierpinski Carpet
Start by asking students what happens if we use squares instead of triangles when forming the Sierpinski fractal. You may let them try a few drawings for a short while.
Let students open a blank canvas by enabling the small square grid as the background. They can use the unit square from the number tiles.
It becomes Sierpinski Carpet!
This time, to make the drawing easier, students can start with 3 by 3 squares and remove the one in the middle. Then, connect 9 of them to create 9 by 9 square and again remove the 3 by 3 square in the middle. Here is the demonstration canvas.
Let the students complete their drawings.
Again, there are several properties students can explore about the Sierpinski Carpet. Share this canvas with students. To be able to answer the questions on the canvas, discuss the perimeter and the area properties of the Sierpinski Carpet Fractal using questions like
- What happens to the perimeter of the fractal?
- What is the growth pattern of the perimeter of the fractal?
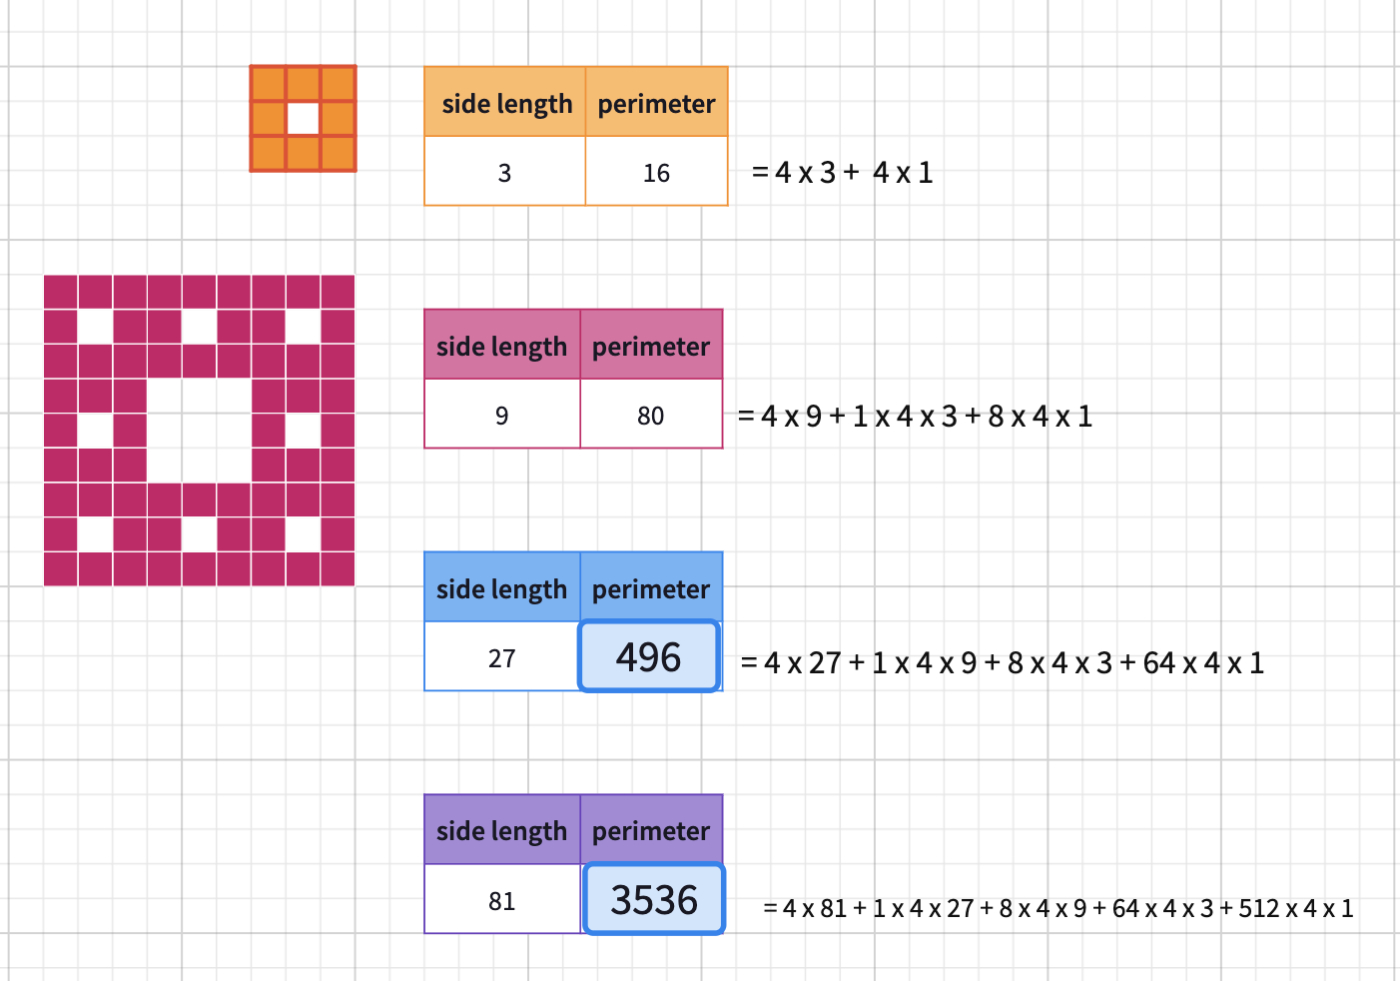
- Let them conclude that, like the Sierpinski Triangle, the carpet will have an infinitely large perimeter if we repeat the process infinitely many times.
- What is the growth pattern of the perimeter of the fractal?
- What happens to the area of the fractal? Let students use the given tables to explore the shaded (colored) area and the white(removed area). Give them some time to make their calculations.
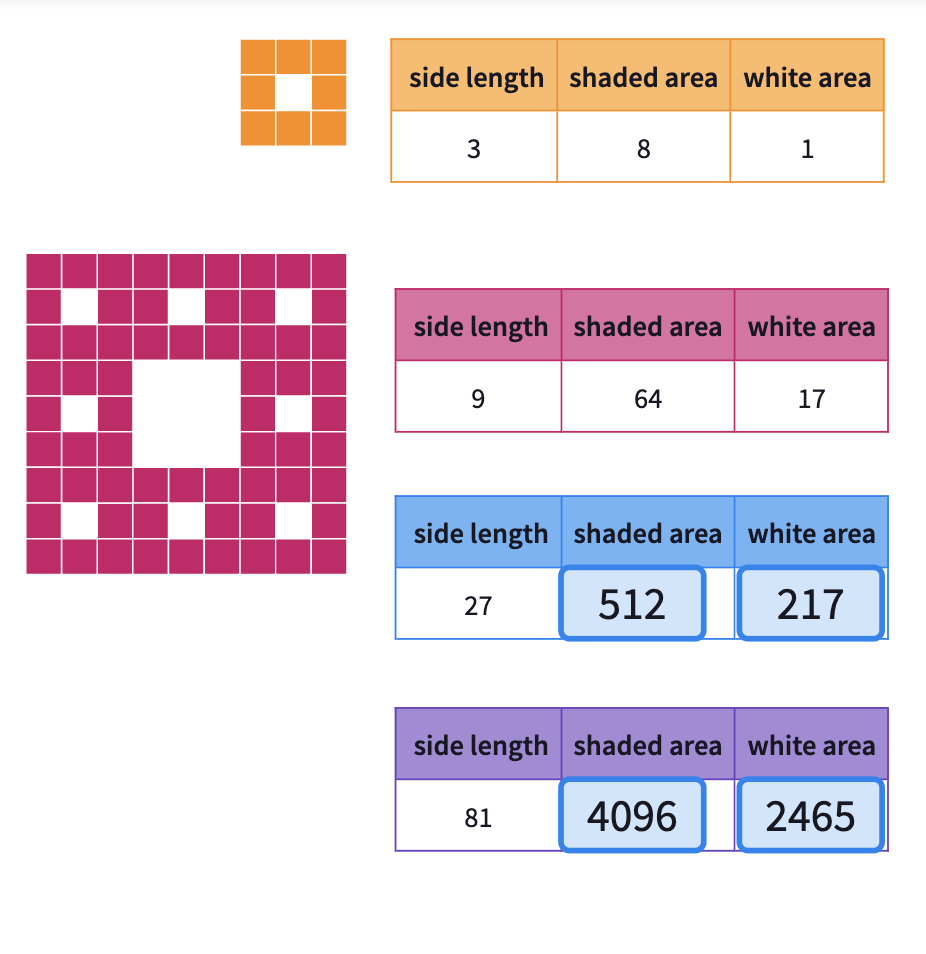
- What is the growth rate of colored areas and removed areas? How can we compare them to predict the next steps?
- They might use their ratio or the ratio of colored areas to total to represent their findings.
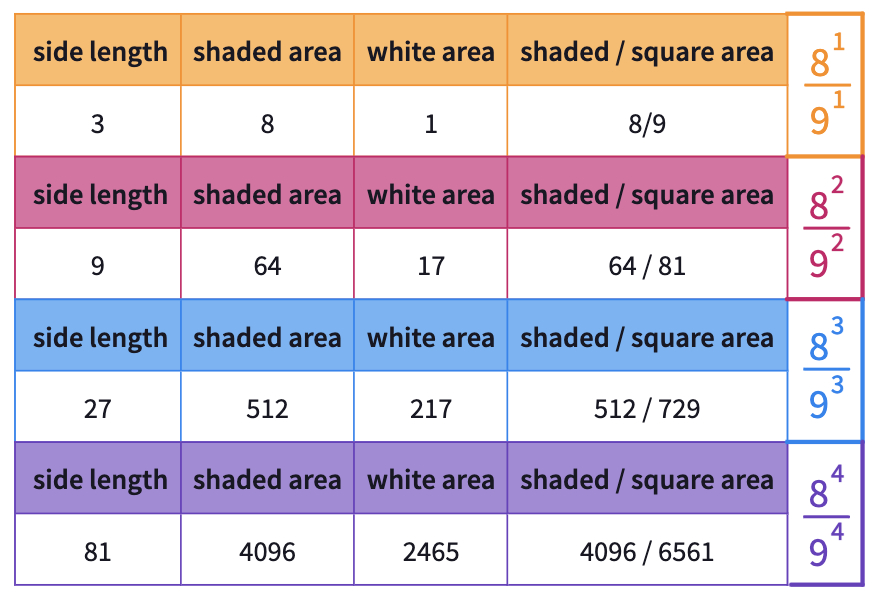
- Clarify with students that the growth rate of removed areas is higher than the colored areas. You may want to also ask in which step the total removed area will be higher than the colored area.
- To explore the answer, you may suggest students use as the side length of the square whose removed areas are more than the colored ones.
- Ask them to write an expression using for
- the colored area total in terms of n. ()
- the total area in terms of n. ()
- the total of the removed area.
Clarify with the students that we are looking for the value of where
By using the exponential and logarithmic calculations
In other words, if we calculate the removed area vs. colored area for a square with the side length ;
- the colored area for n=6 >> = 262 144
- the total area = 531 441
- the total removed area. = 269 297
Students proved that the total of removed areas would be higher than the colored areas by the sixth step. Therefore like the Sierpinski triangle, the carpet also has a finite (close to 0) area with respect to the infinite perimeter.
Here you may want students to predict the dimension of the Sierpinski Carpet.
Since it is something in-between a two-dimensional area and a one-dimensional line, students need to predict a fractional dimension between 1 and 2.
Ask students to calculate the dimension of the Sierpinski Carpet to close the lesson.
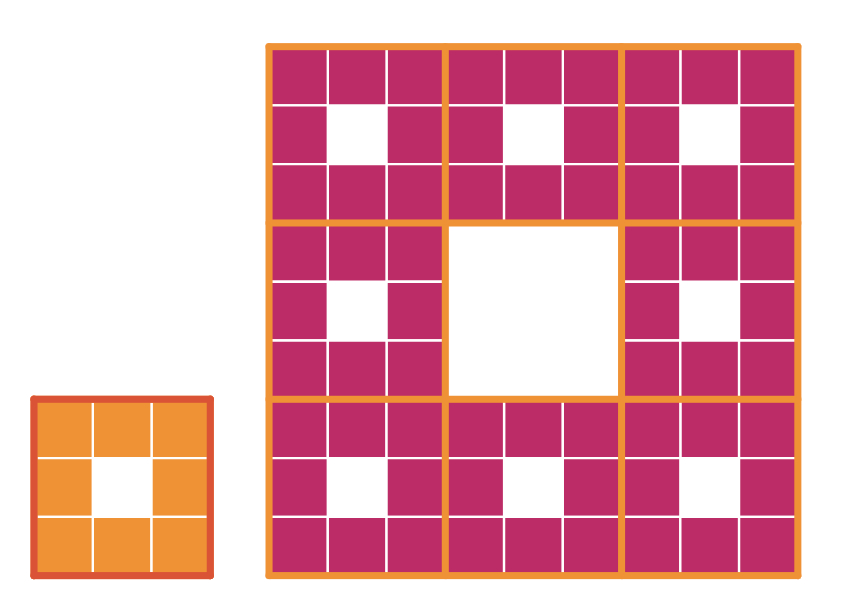
Here we triple the carpet, and its area becomes times bigger.
so the dimension of the Sierpinski Carpet is
Activity #6 - Menger Sponge
You may start asking students if all fractals are flat like the examples they saw until now.
Fractals don’t have to be “flat”. For example, one of the most famous fractals that look three-dimensional is the Menger sponge, named after the mathematician Karl Menger who first described it in 1926.
They may think of the Menger Sponge as the non-flat form of the Sierpinski Carpet. Instead of starting with a 3 x 3 square, this time, we will begin with a 3 x 3 x 3 cube.