Overview and Objective
The goal of this activity is to enhance students’ creative thinking in mathematics. In this activity, students will use geometric constructions to build the pieces of the magic egg tangram. Then, they will use the tangram pieces to form different shapes. At the end of the lesson, students will make their own creations to express their geometric imagination using this extraordinary tangram puzzle.
Warm-Up
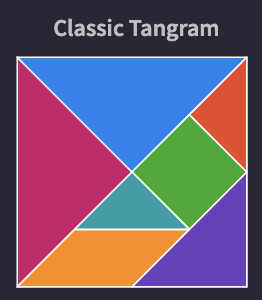
The most well-known tangram is the square tangram. According to an ancient Chinese legend, an old wise man was tasked with constructing a window at the Chinese emperor's palace. He wrapped a square glass in the silk, but upon arriving at the palace he dropped the pane, and the square glass had broken into seven geometric pieces. He attempted to collect the pieces back, but he came up with a different shape every time he tried. In the end, the emperor became more pleased with the infinite amount of combinations and interesting shapes.
Soon the puzzle was reincarnated with paper, wood, and other materials and spread across the world. When re-creating a tangram puzzle, one must construct the pieces carefully by measuring and calculating the angles and side ratios.
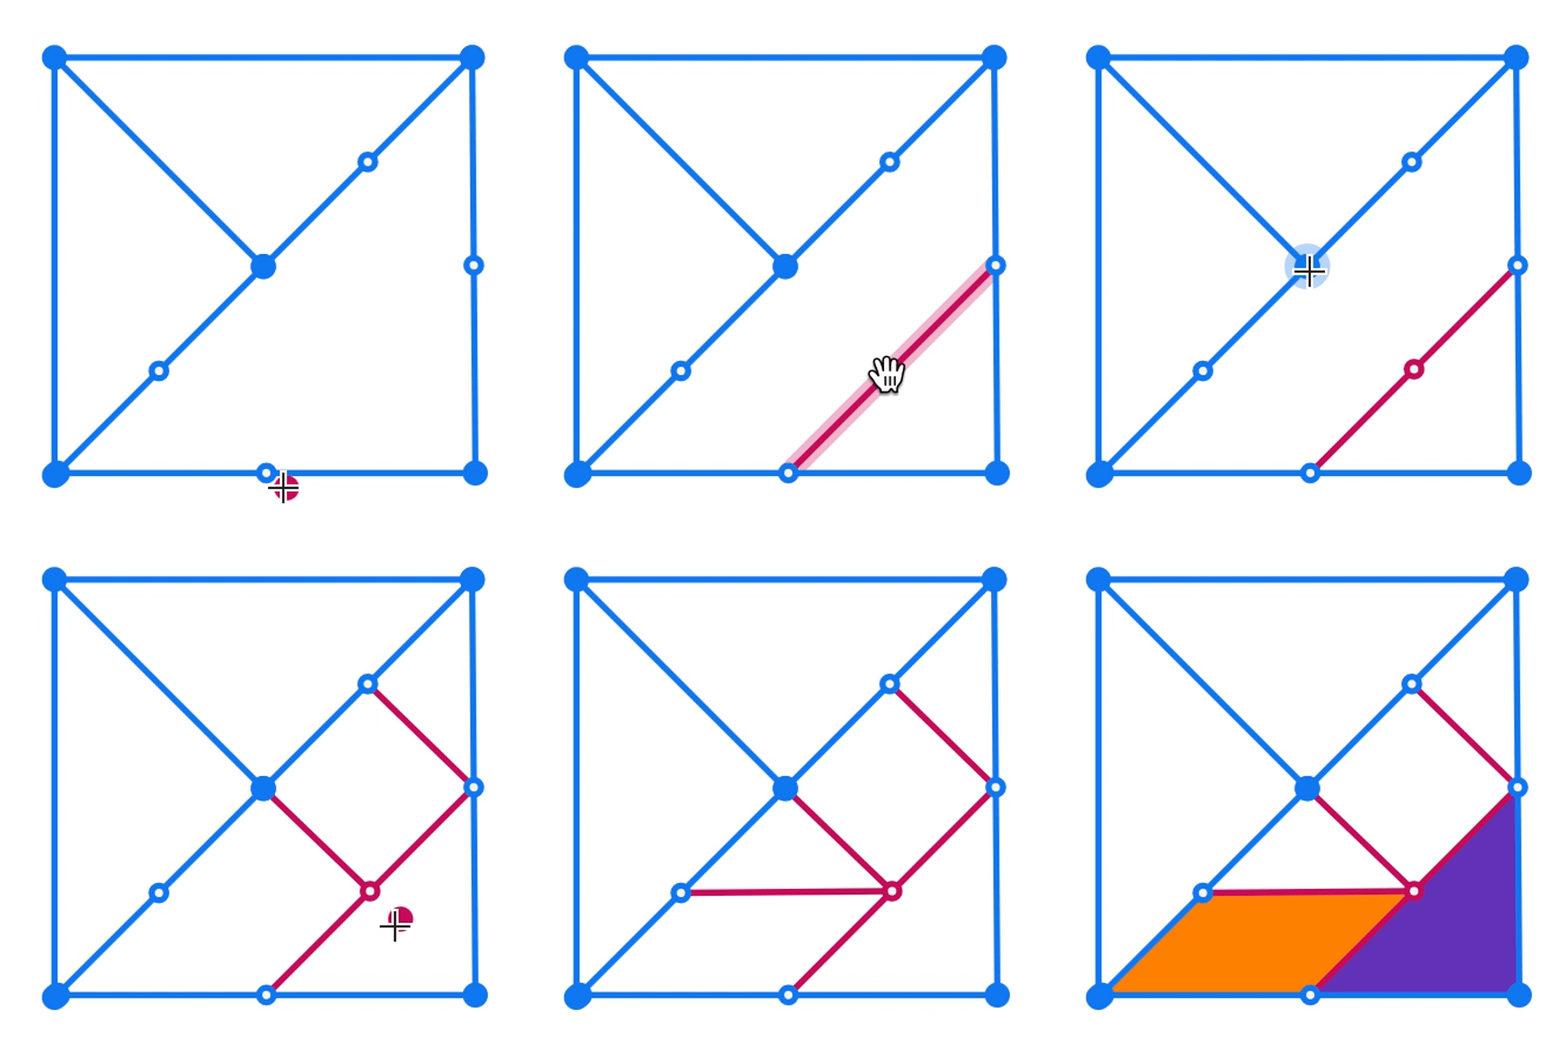
As a class, you can discuss the side lengths and ratios of the square tangram. Click here to learn more about using the geometric construction tools on Polypad.
- Diagonals of the square create two big triangles.
- Connecting the midpoints of the sides of the square and the triangles create the other shapes.
- The big triangles have of the square area. The purple one has the smallest two triangles have , and so on.
Main Activity
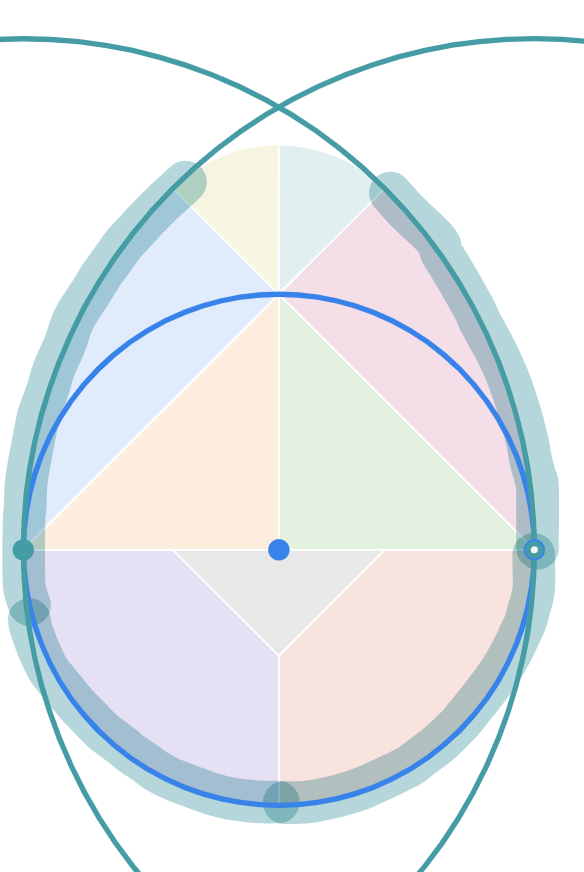
Now, Introduce the Magic Egg on Polypad. The Magic Egg consists of nine pieces. You can flip, slide and turn them to create various patterns. The most popular are birds.
Invite students to drag all the pieces of the egg tangram to a blank canvas and create the egg form. Then, discuss the pieces they can identify by using measuring tools like a ruler and protractor. They might identify some of the pieces - isosceles right triangles, quarter circles, and small circles.
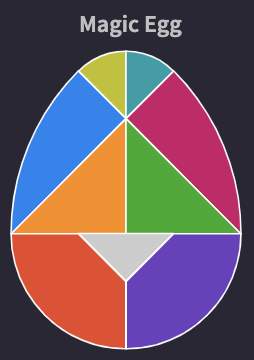
Challenge them to come up with different ways to construct the egg tangram pieces and perhaps maybe use some Polypad's shortcuts. For example, here is one of the possible construction methods.
Construction of Egg Tangram
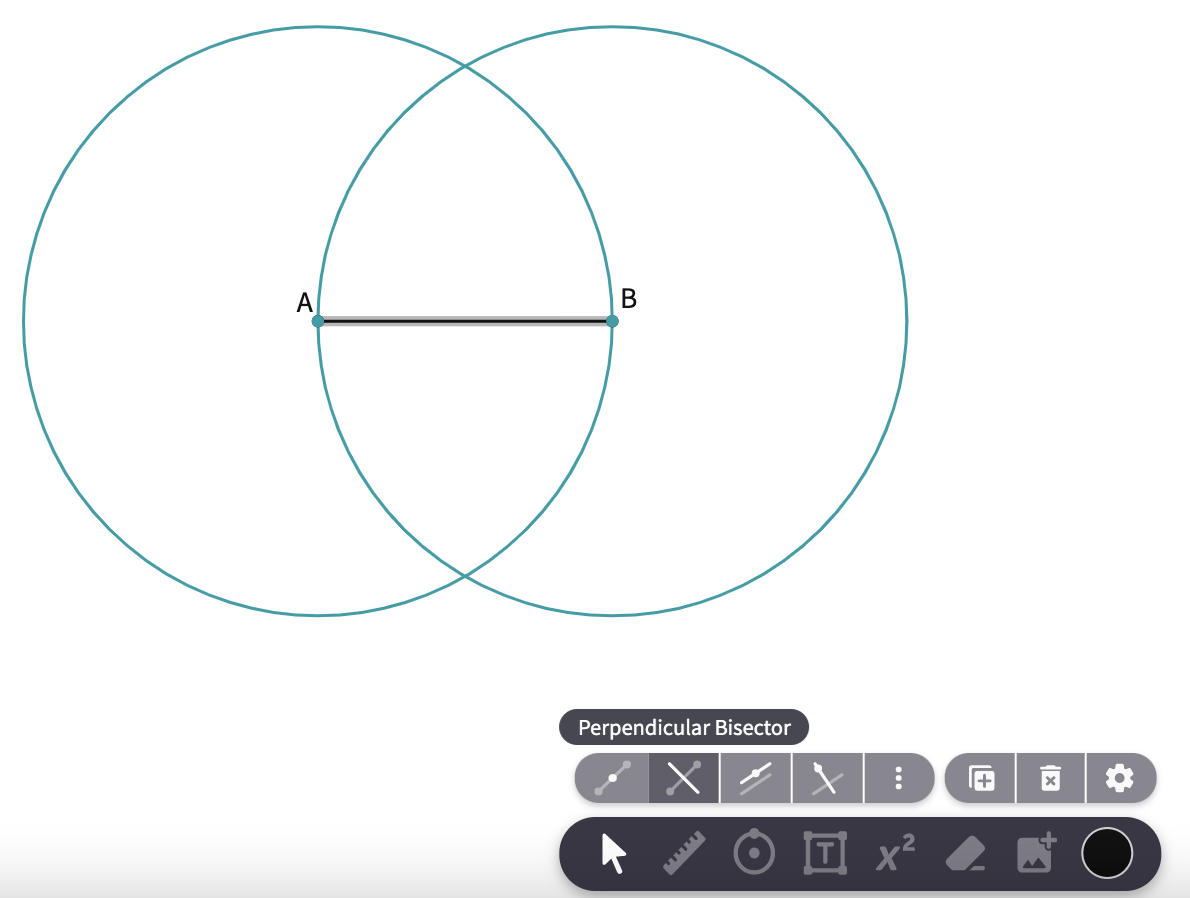
- Ask students to try to construct a circle that overlaps with the outer curve of the egg. You may want to label the endpoints of the widest line of the egg as A and B. Clarify with the students that the first step of the construction is drawing two intersecting circles (like a Venn Diagram) with centers A and B and the radius |AB|.
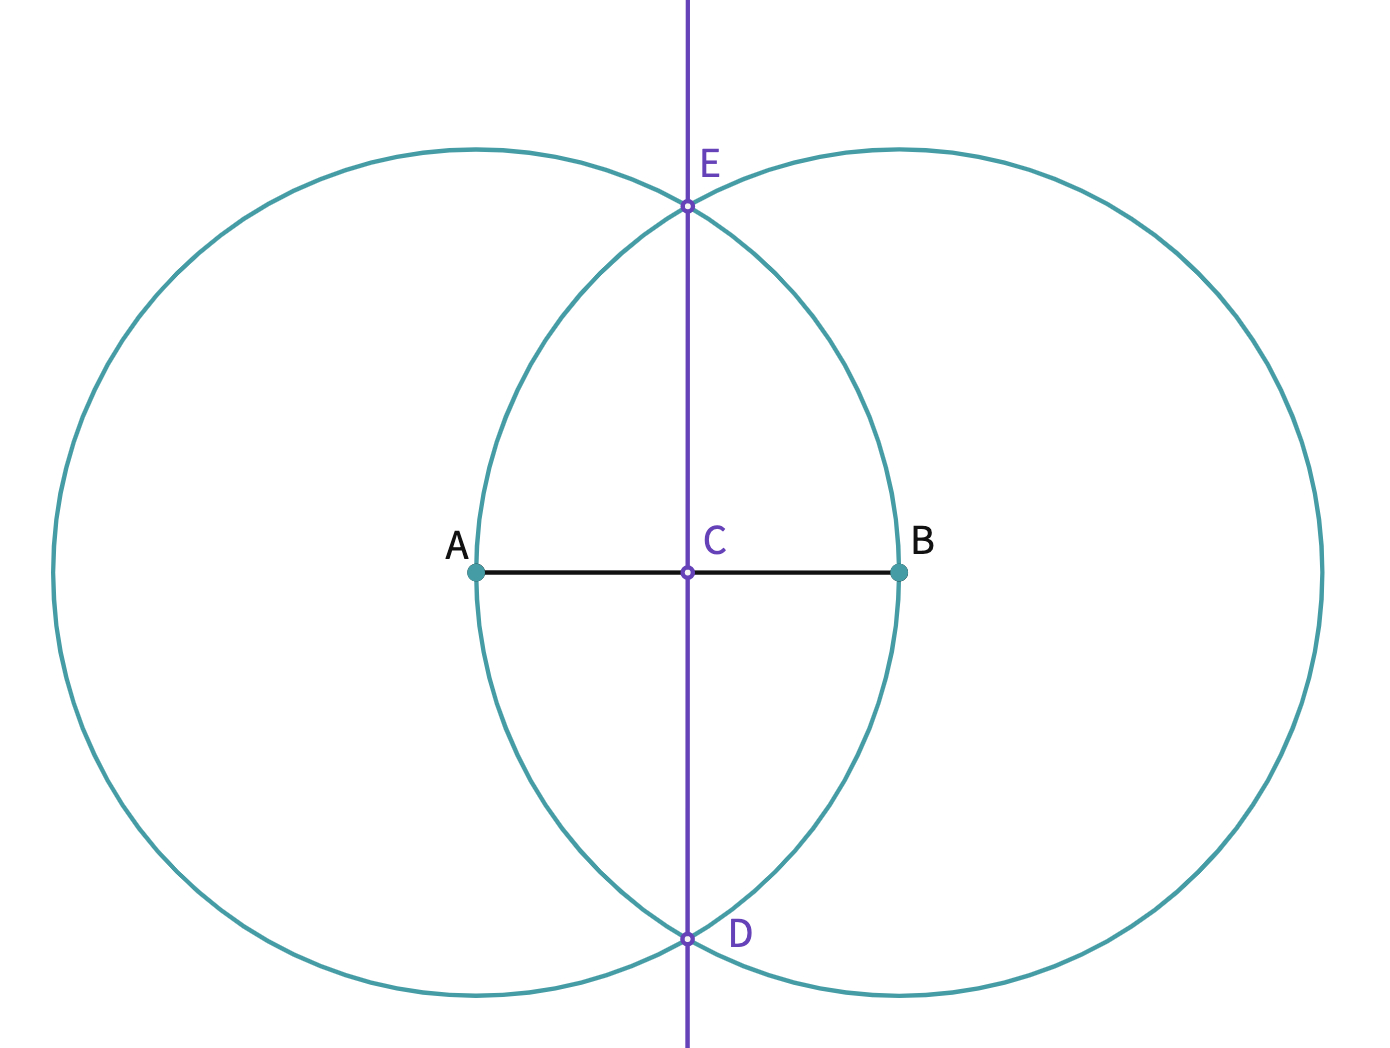
- Discuss how the vertical axis can be constructed by using the fact that the vertical halves of the egg are identical. Thus, the vertical axis is the axis of symmetry for the egg. After the students come up with the idea of a perpendicular bisector, you can remind them to select the AB line segment to see the construction options at the bottom center toolbar.
- Tell the students to construct and label three intersection points by using the point tool as C, D, E.
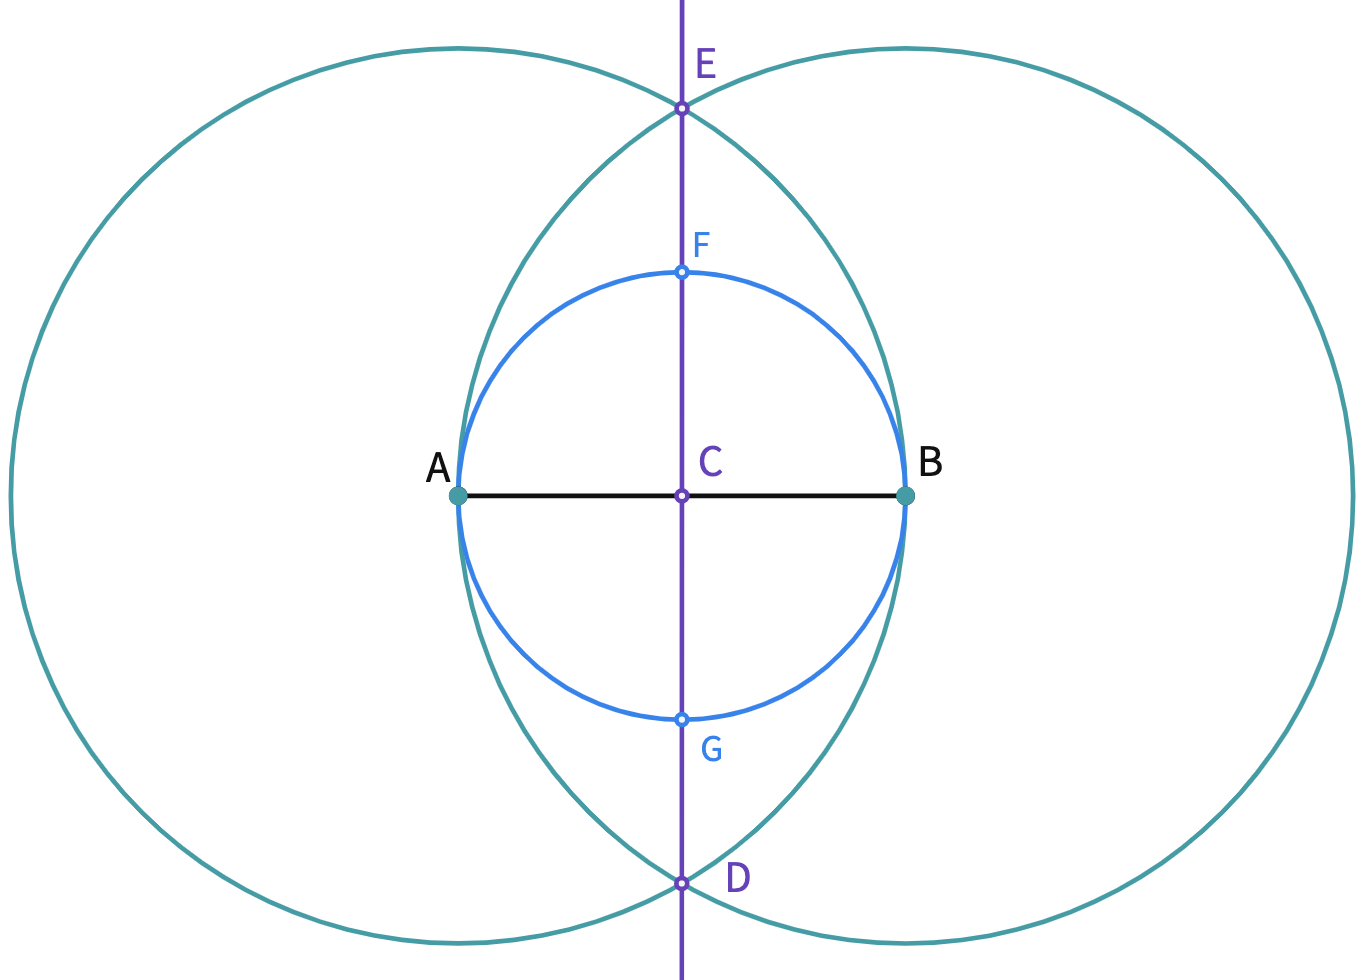
The upper part of the egg started to appear., now we can have a close look at the two large triangles and the quarter circles at the bottom. After getting students' comments, you can clarify that another circle is needed with center C.
- Construct a circle with center C and radius |CB|. Construct point F, and G the point of intersection of the new circle and the perpendicular line.
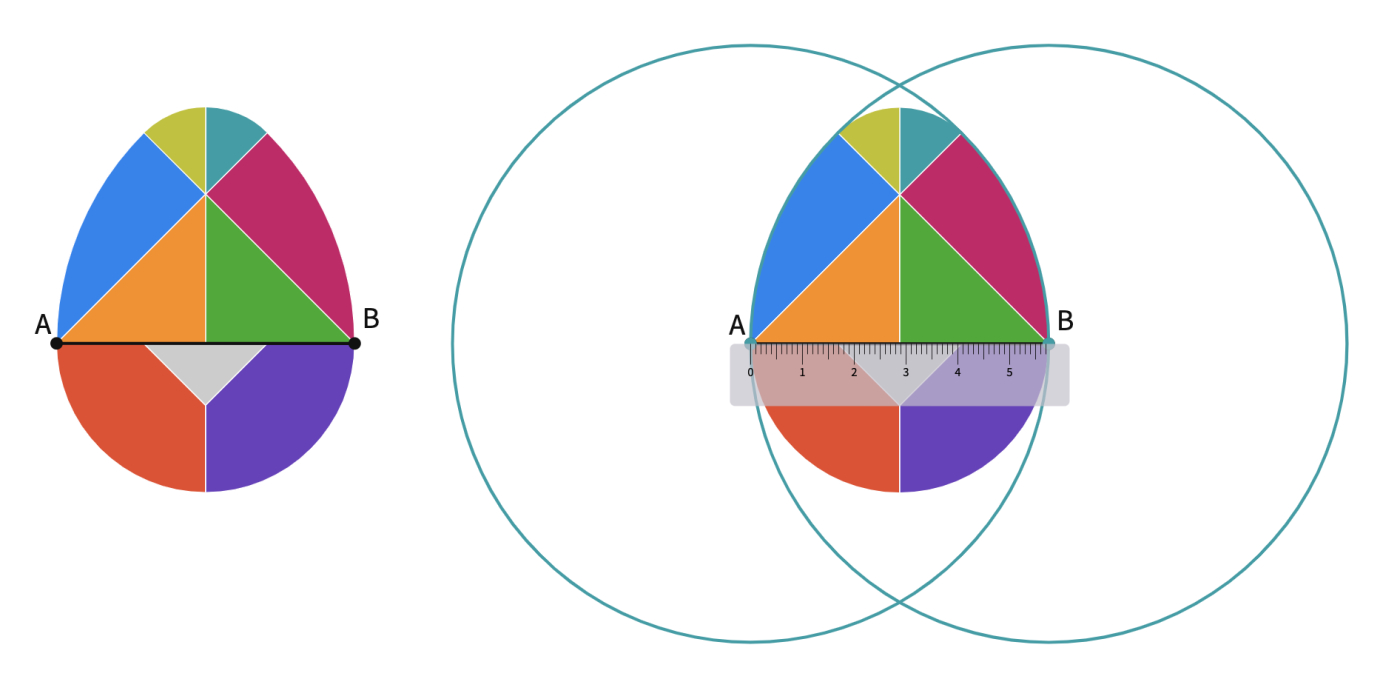
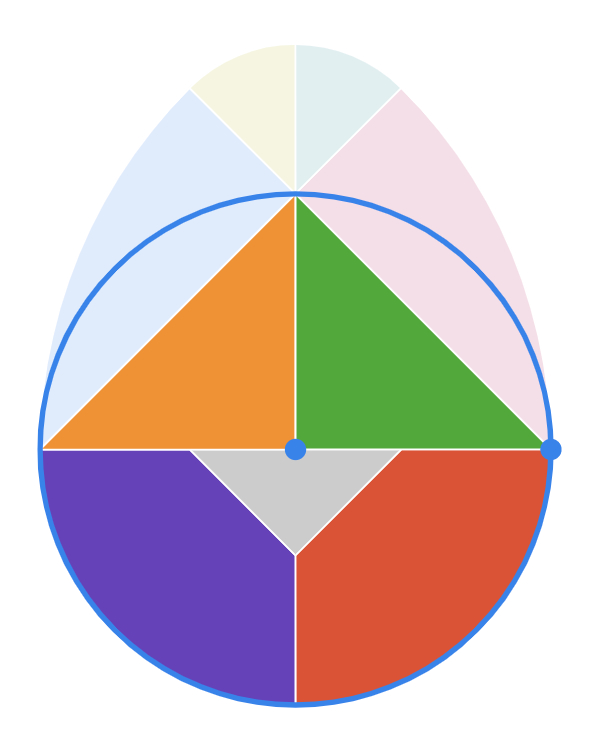
Students can always check their progress and think about the next steps by dragging the original egg tangram on their drawing. They can also adjust the transparency of the tangram's colors to see the lines and circles better.
Discuss possible next steps.
Only the very top of the egg remained without outlined. Therefore, we need a smaller circle at the top to create the 1/8 circle pieces.
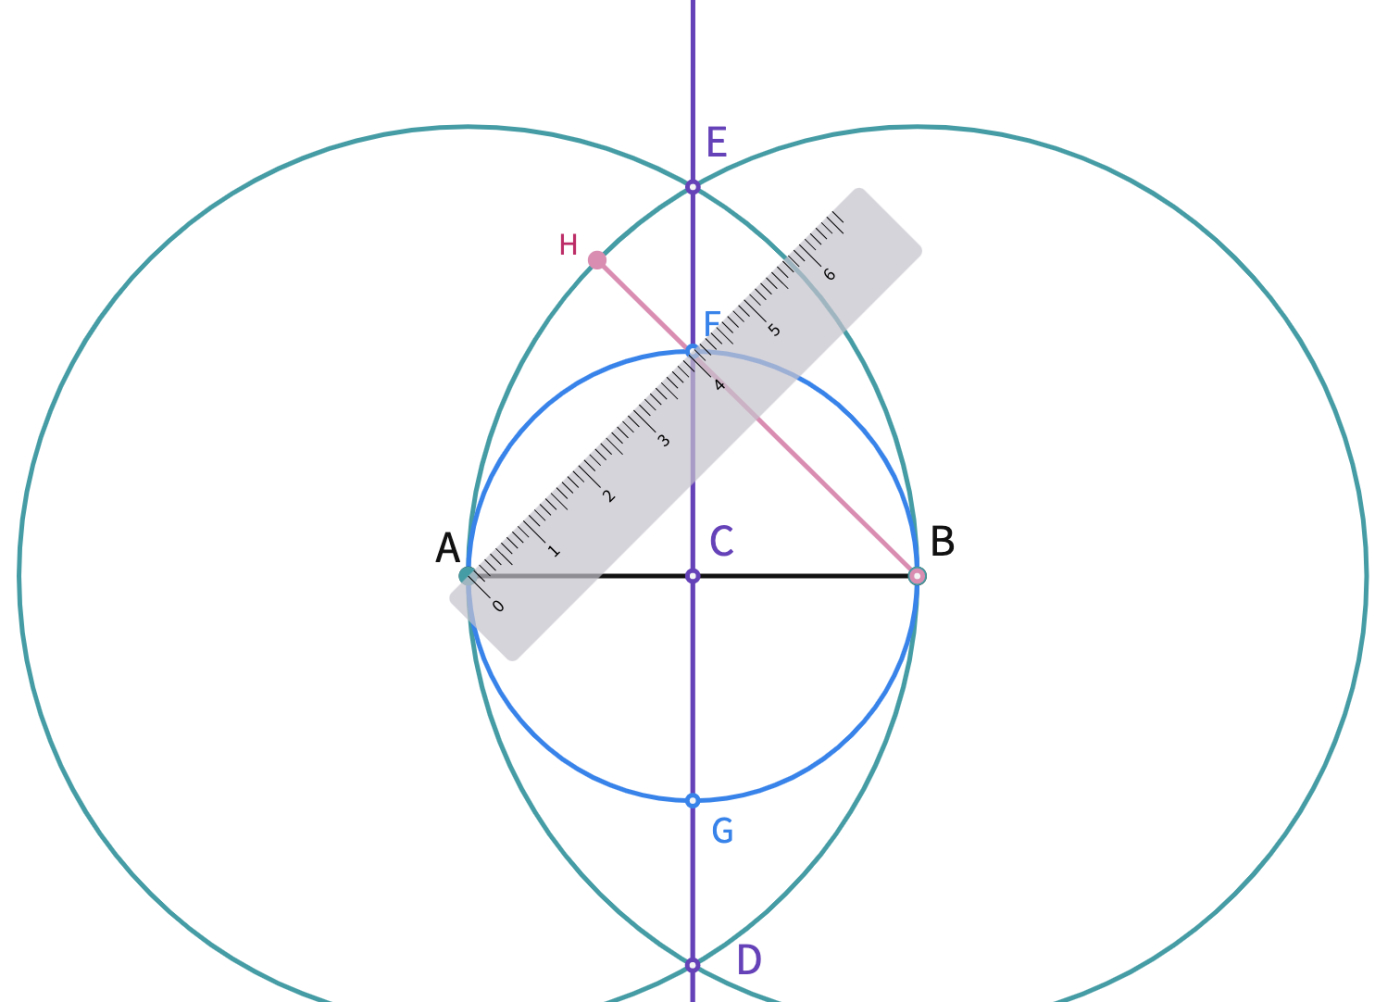
- Use the ruler the draw a segment passing through B and F and another segment from A and F. You can label the new intersection points as H and I.
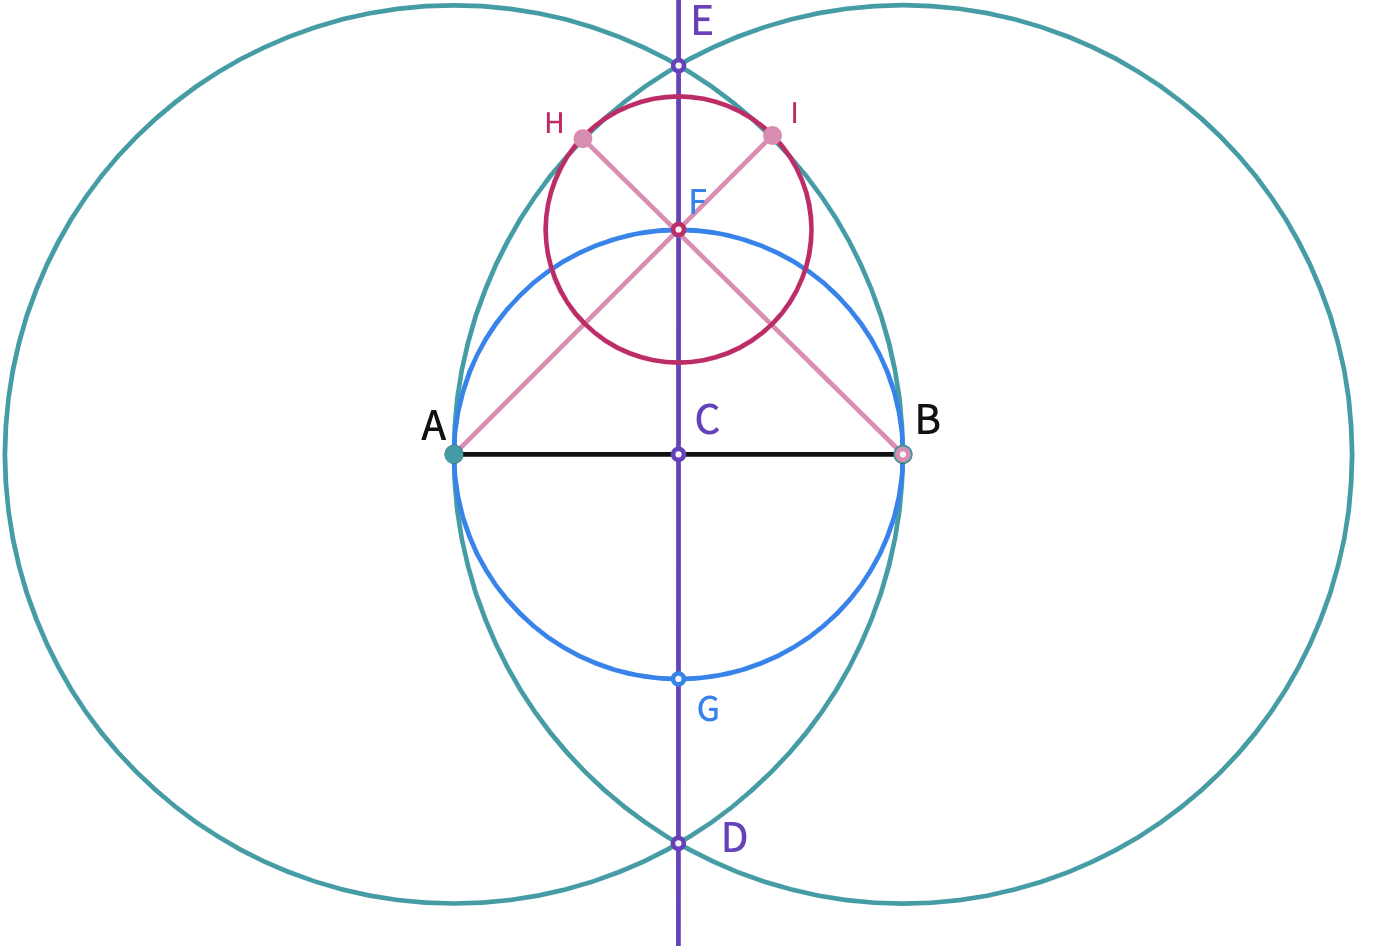
- Draw a circle with the center F and radius FH.
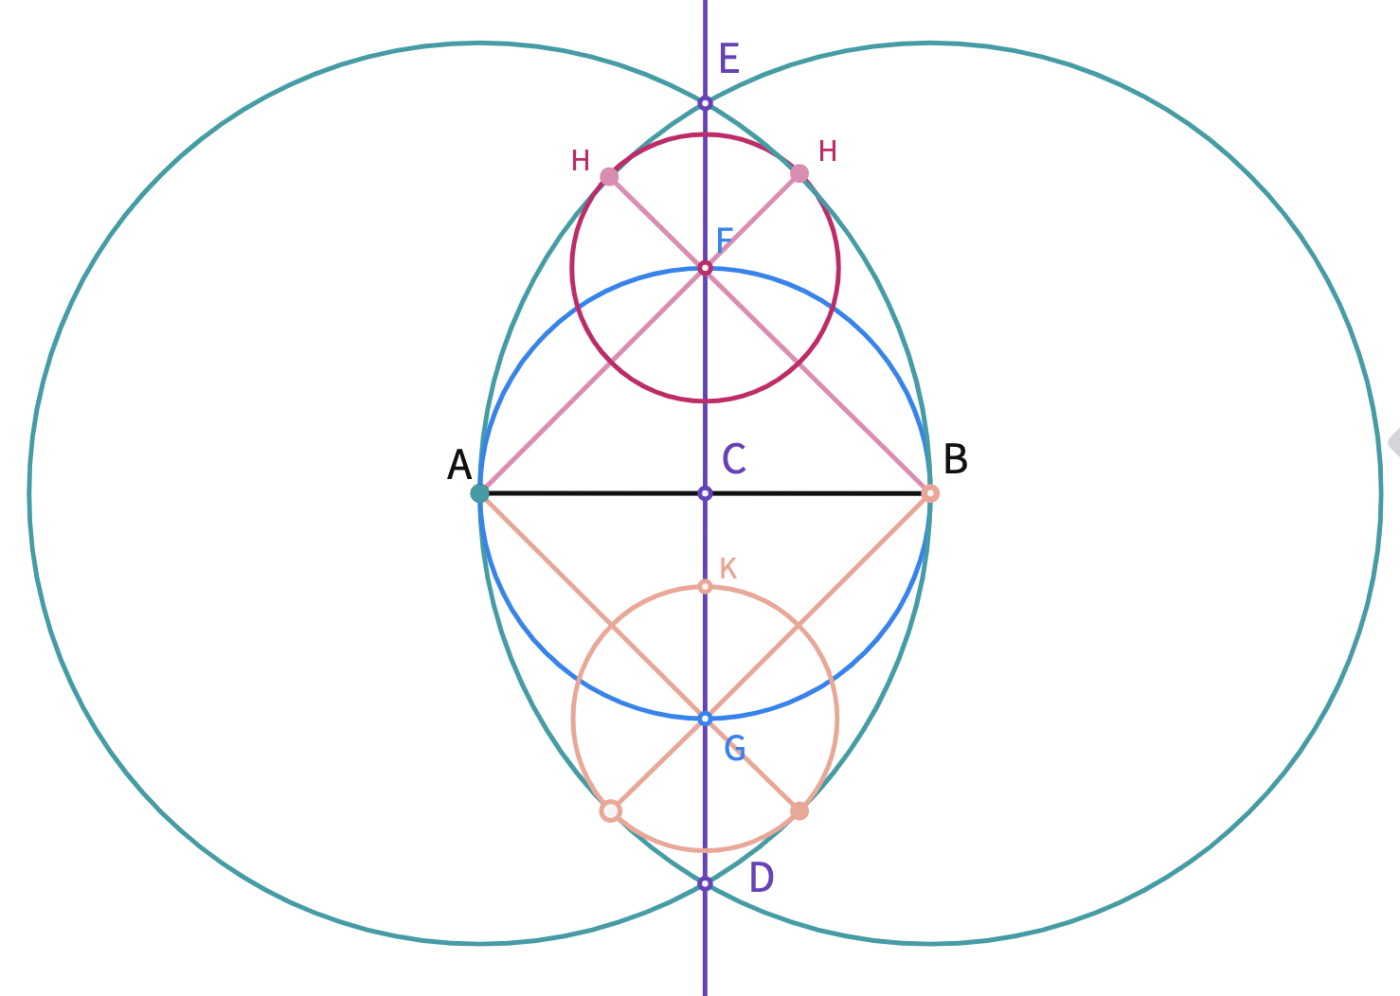
- At the last step of the construction, we need a congruent circle with center G. To do that; we can repeat the last two steps for the bottom half of the egg tangram.
- To create the small white triangle piece, we can draw another circle with center C and radius |CK|. Finally, the points of intersection of the circle and segment AB can be labeled as M and N to help construct the last piece.
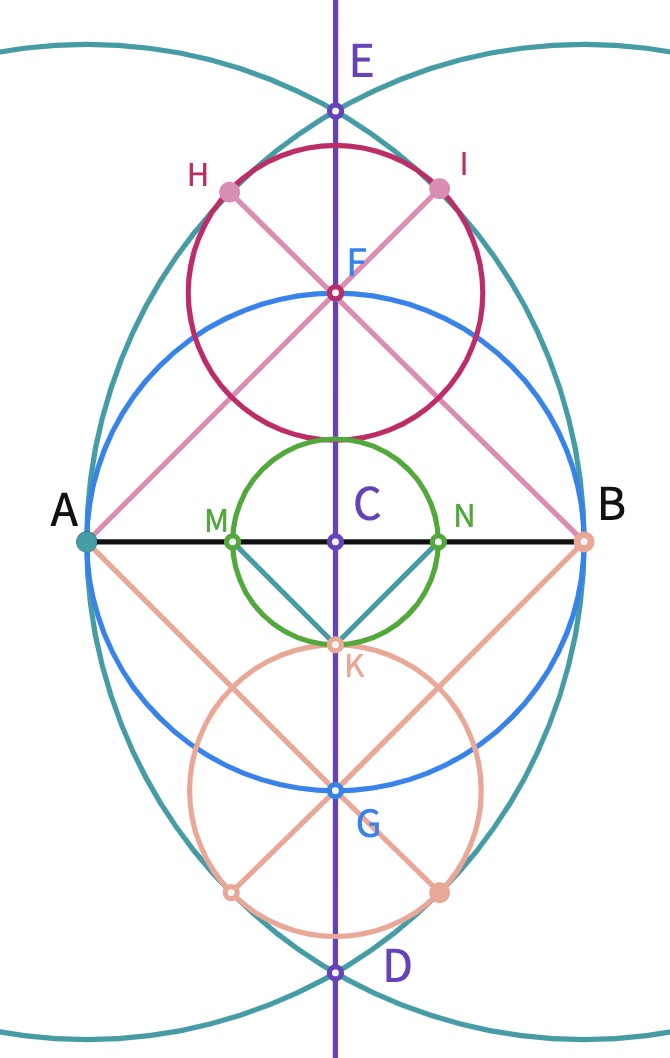
Students can drag the tangram back to check each piece.
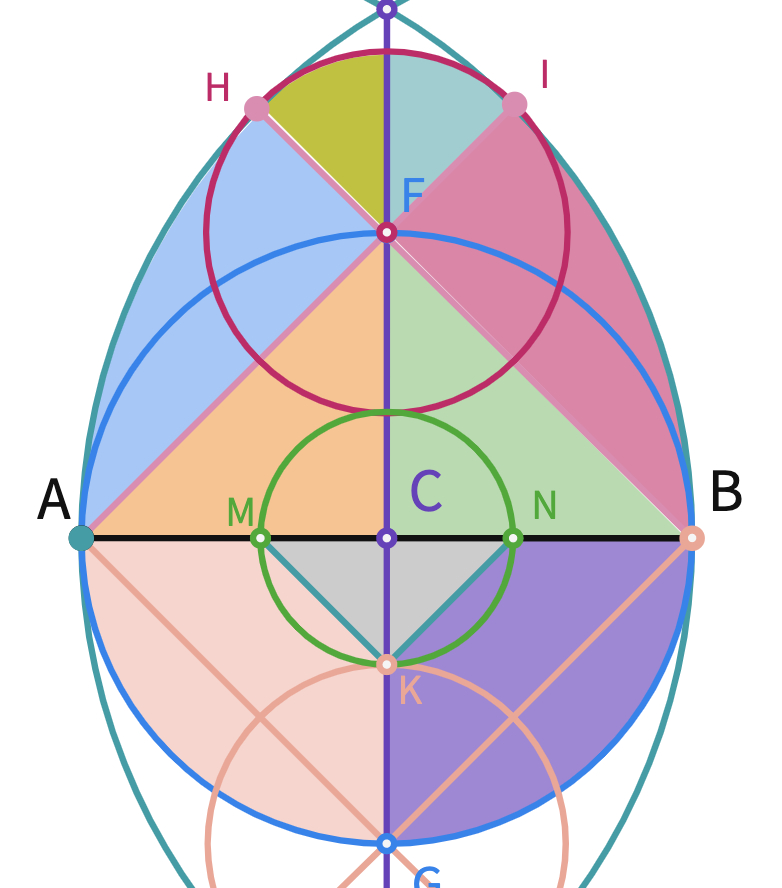
Closure
At the end of the lesson, discuss that the Tangram puzzles have been around for over 2000 years. Therefore, it was essential for each piece to be constructed with a compass and ruler, which are also the only available technologies then.
To close the lesson, share this canvas with the students. Invite them to try solving the puzzles. Additionally, you may encourage them to make some of their own creations with the egg tangram pieces. Click here to read more about students making puzzles for their classmates to solve.
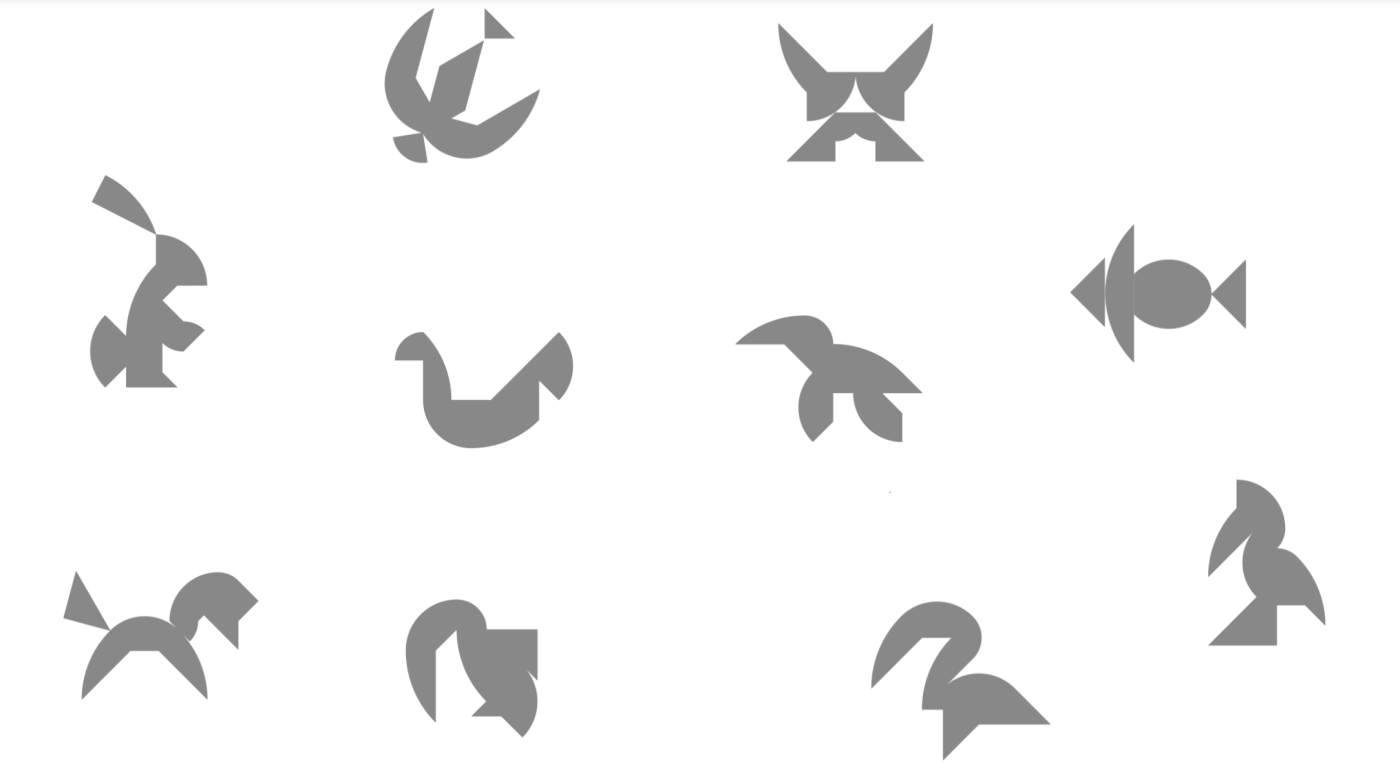
Here are the solutions to the birds above.
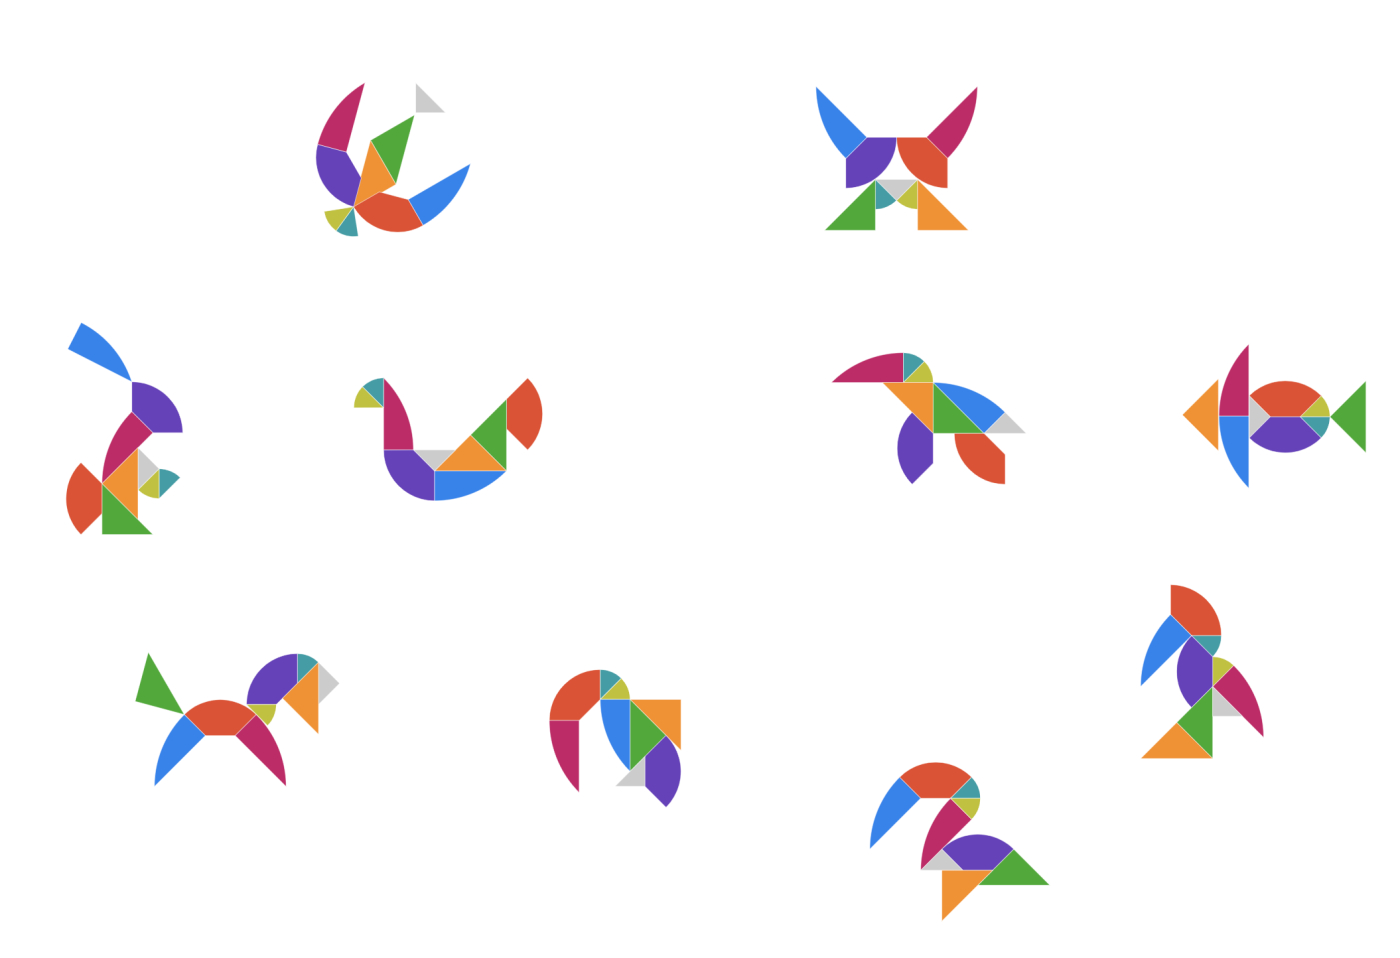
Support and Extension
For students ready for additional extension in this lesson, consider showing the heart tangram and ask them to re-create the tangram pieces using the Polypad tools.

Polypads for This Lesson
To assign these to your classes in Mathigon, save a copy to your Mathigon account. Click here to learn how to share Polypads with students and how to view their work.